While you can use DTMF tones to operate your node, a companion app is a great way to control your Hamvoip based Allstar node as well. The one I like to use is the ” Node Remote app ”
I am really impressed with its simplicity, both in use and to get it set up. It is available for download on your phone’s app store both on Android and Apple, there is a small charge for this app, but you will find it well worth it.
To get it running you need to make some very simple and easy changes to just two lines of Linux on the Hamvoip image on your SD card. I will talk you through how this is done …
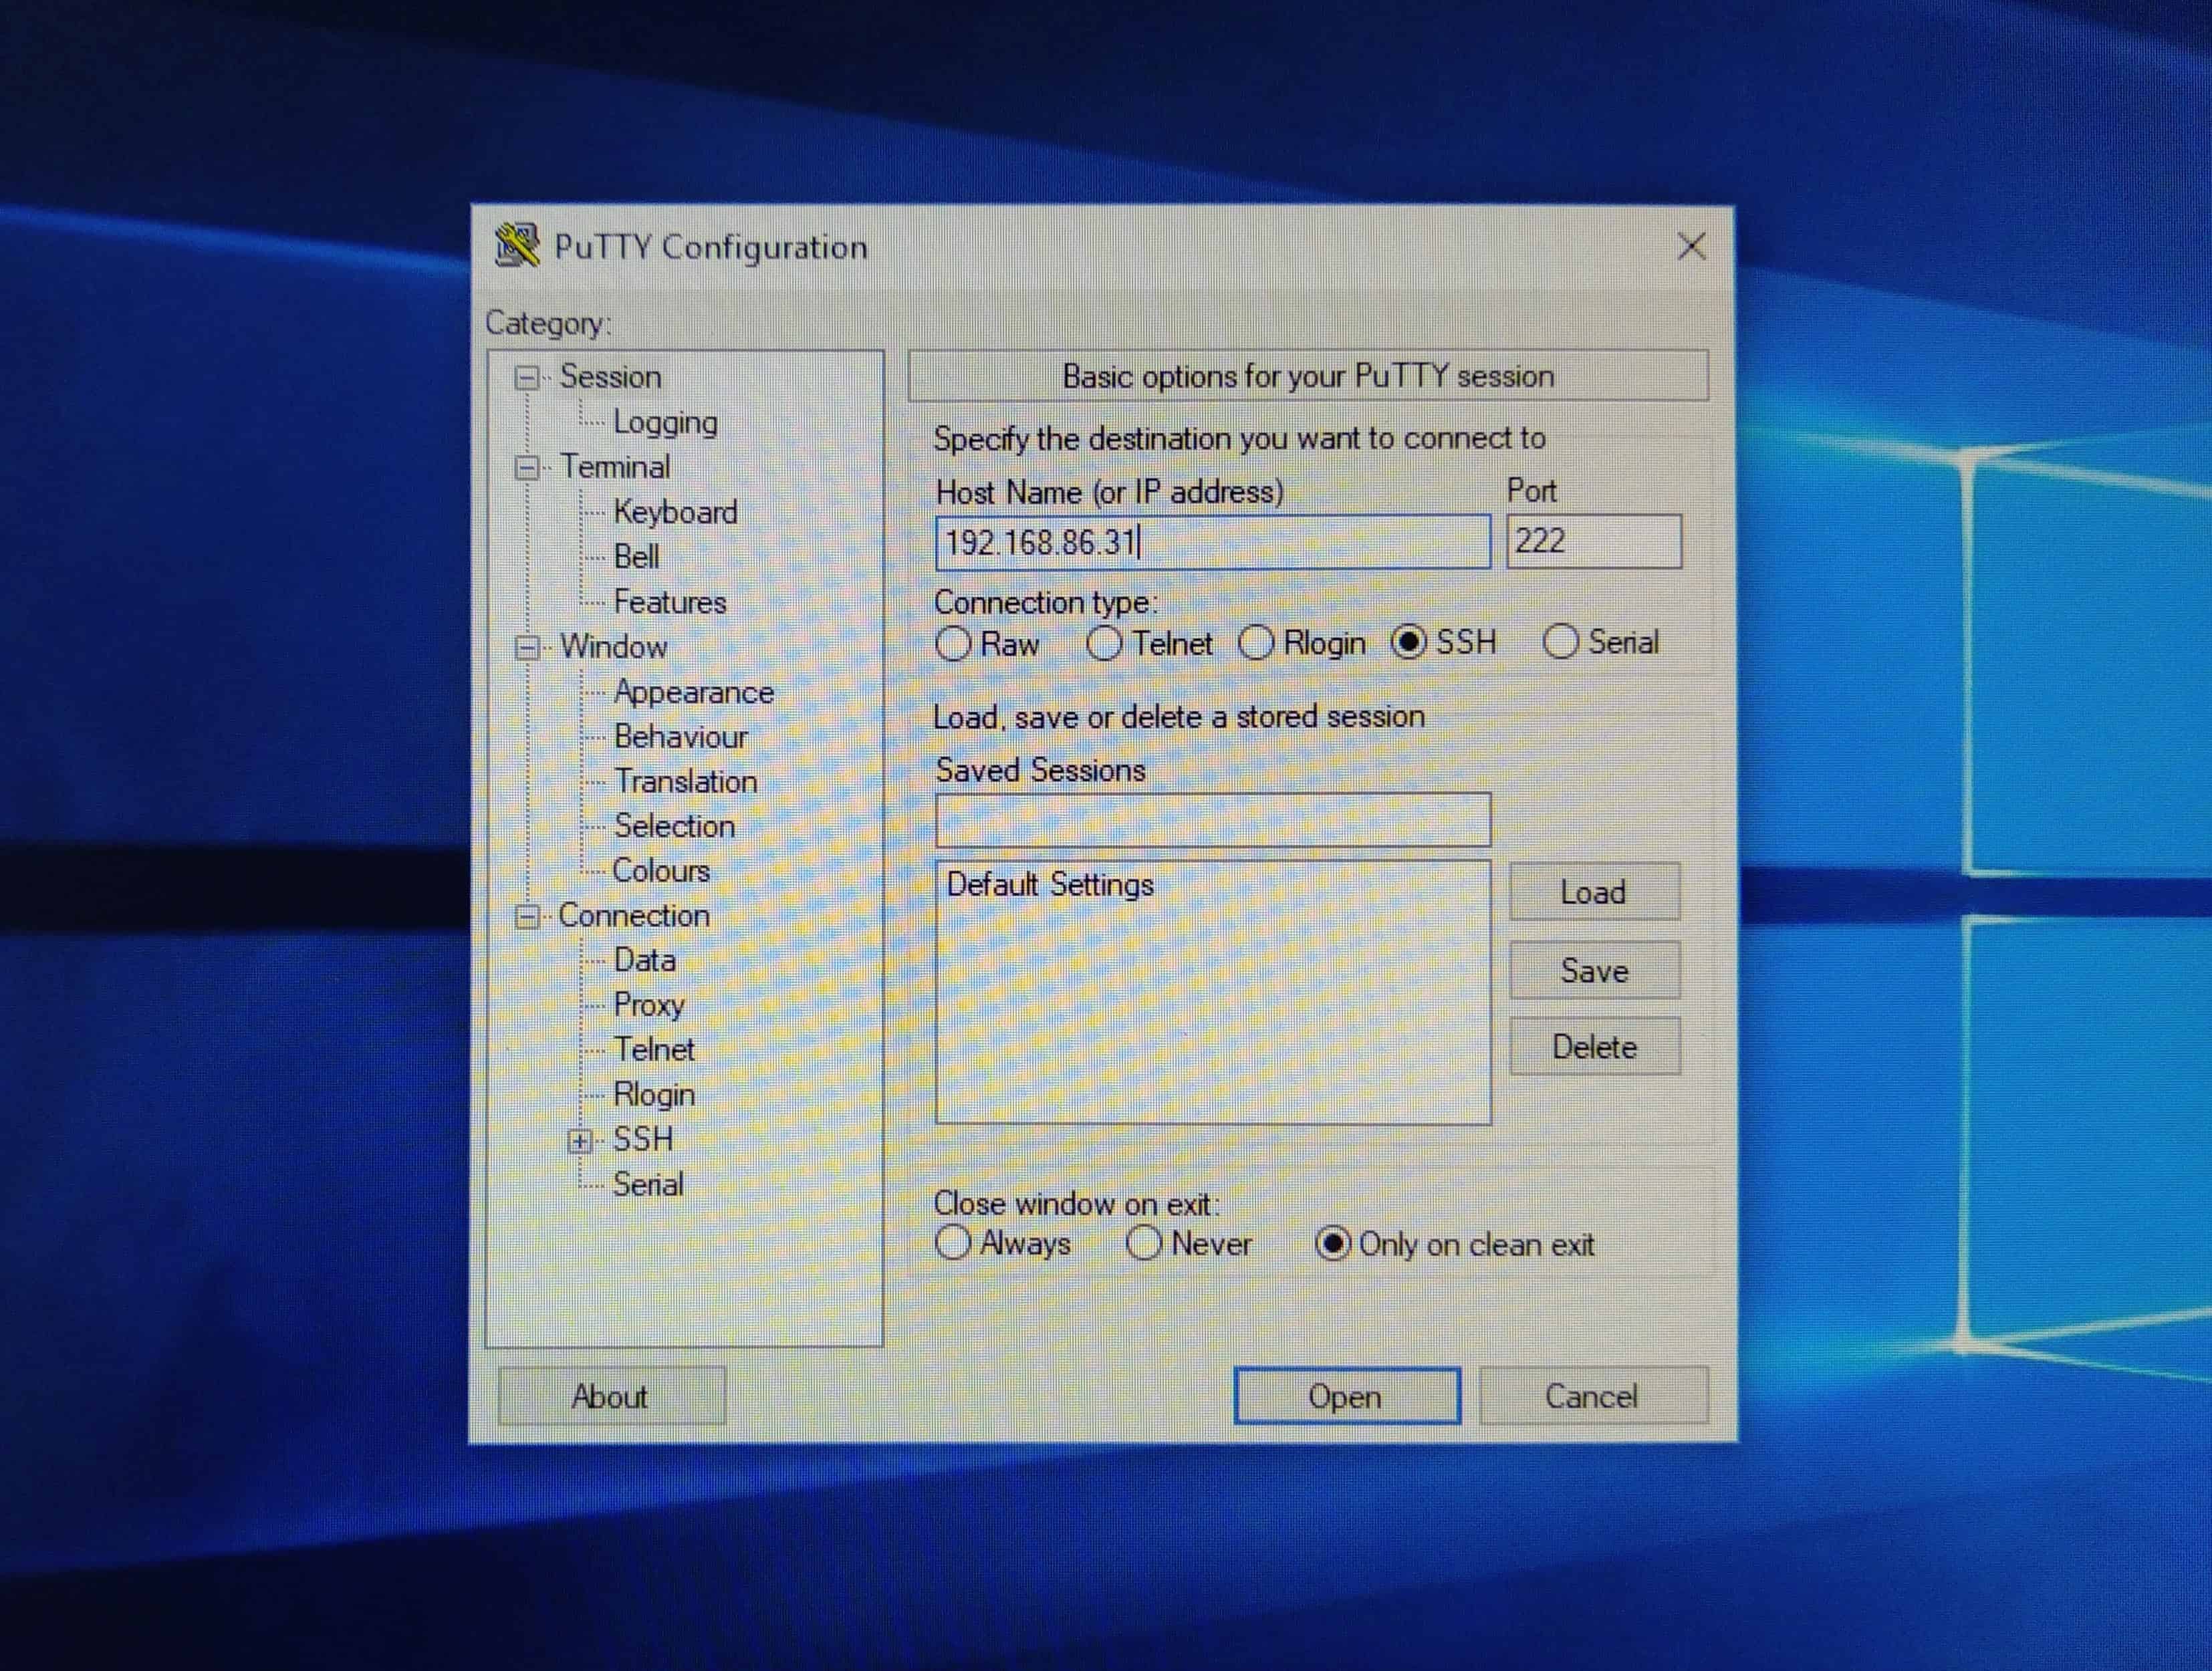
Step 1. Download and run the Putty app.
Putty app - Click to enlarge.
The program that you need to access the software on your SD card is called Putty. You will normally load this on to your Windows PC.
Once loaded you enter the IP address which will have been previously announced by your node when it was last turned on. The port number should normally be 222 and make sure the node and the computer running Putty are on the same WIFI network.
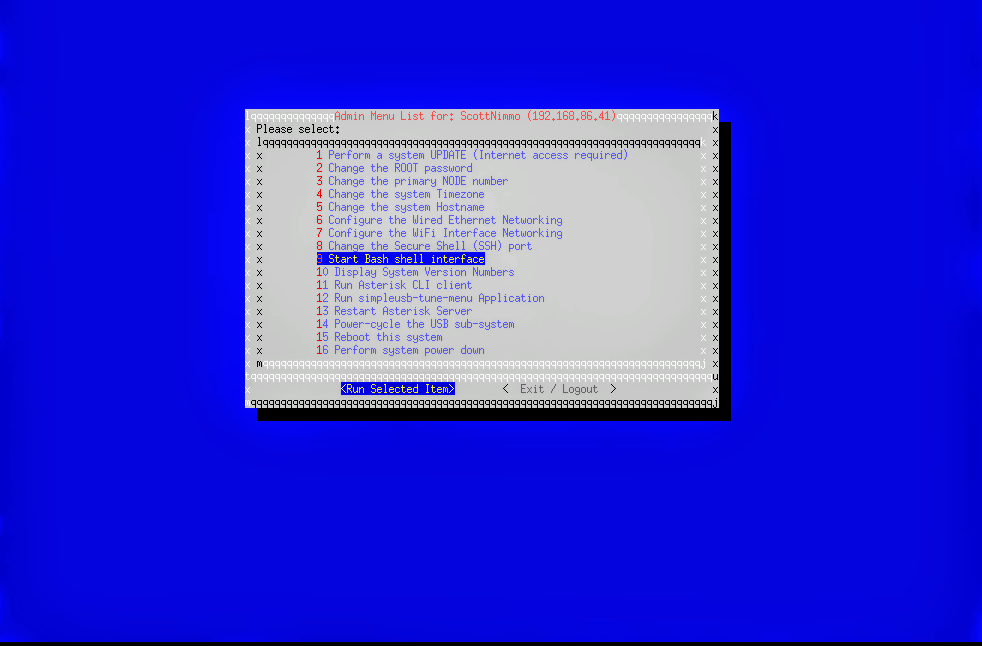
You will know you have successfully accessed your node when you see the Admin Menu List screen shown below.
The Admin menu - Click to enlarge.
Step 3. The bash shell interface command prompt.
Then on the Admin Menu List, screen click on option 9 ” Start Bash Shell Interface ” this will take you to the command prompt of the underlying Linux software your node is running on. { See below } You can then make the necessary changes to get the Node Remote app up and running on your phone.
Click to enlarge
4. Navigate to the asterisk directory and make the changes.
First, make sure you are in the asterisk directory as shown above, if not navigate to it using the cd command, for example { cd /etc/asterisk } use lowercase and note the space after cd.
Once you are in the asterisk directory then type ” ls ” at the command prompt. This will list the files in the directory, you should see manager.conf amongst them.
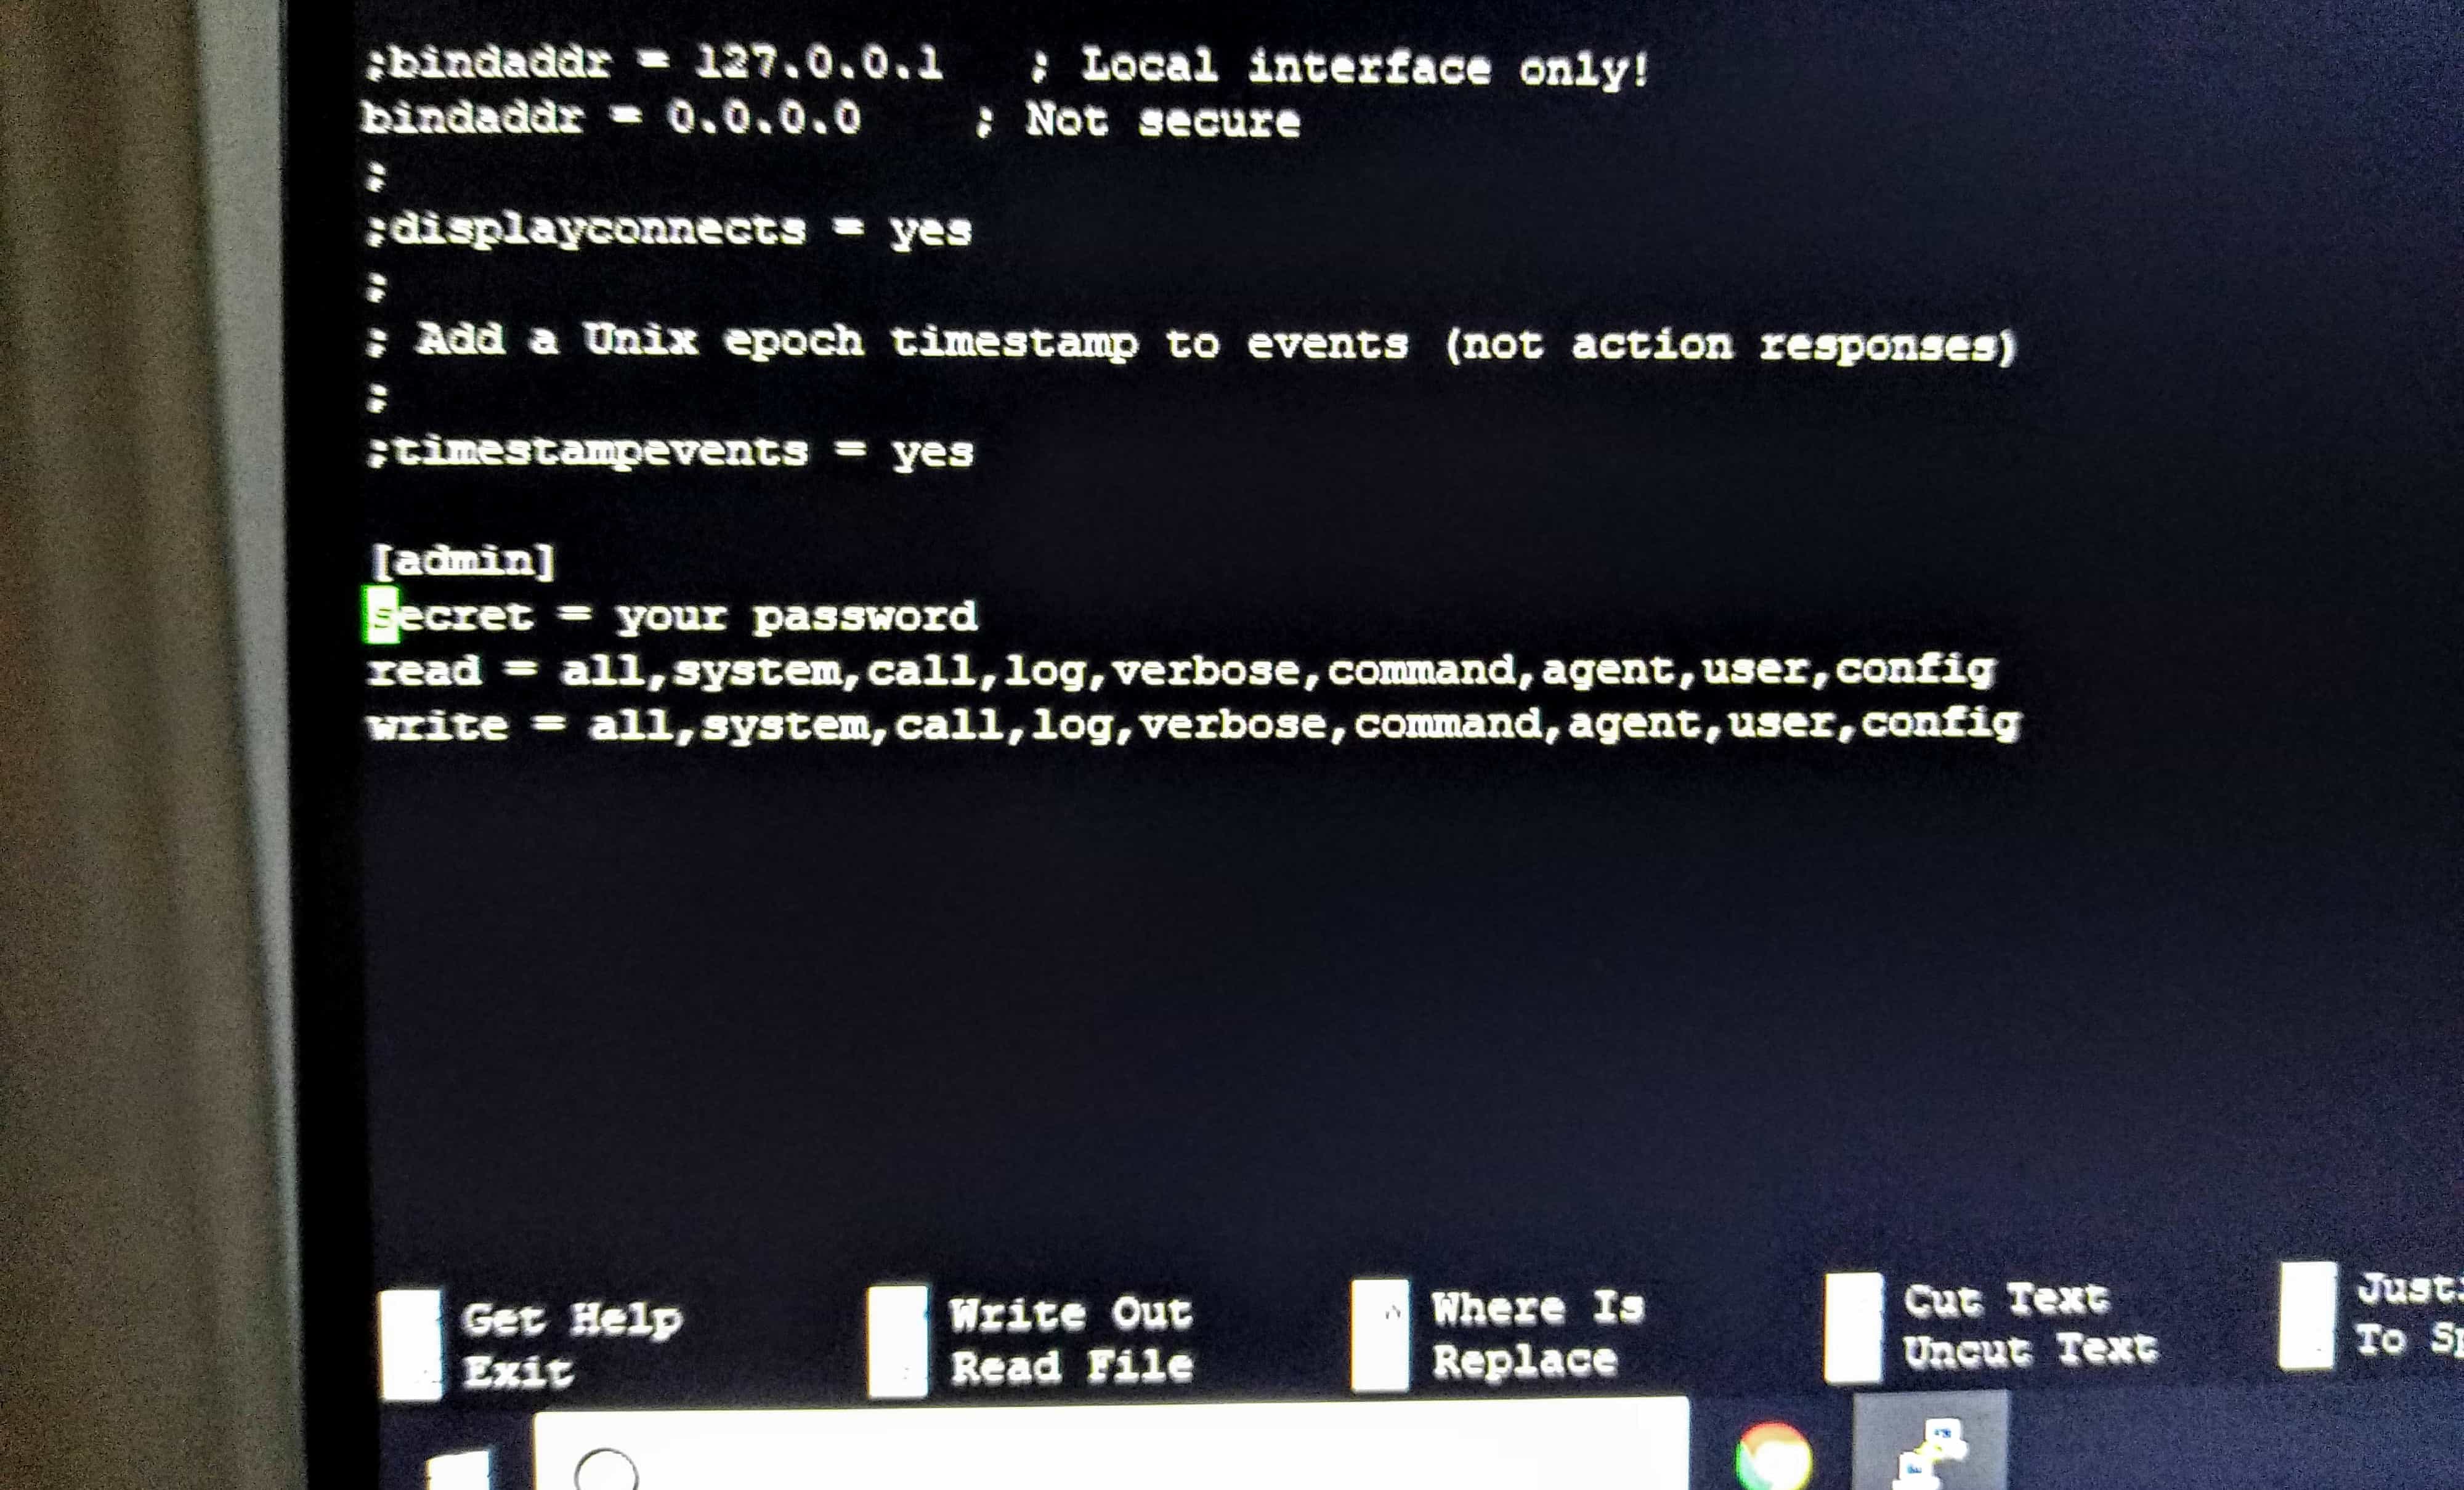
Now you need to use the file editor nano to make just two changes to the manager.conf file, to do this just type ” nano manager.conf ” and the editor will open to make the changes.
You should change the first and second lines down from the top to read exactly as shown in the photo below. Take care with the semicolons.
Then enter your password in the third line up from the bottom, replace the wording ” your password ” with the IAXRPT password you previously set up when installing the Hamvoip software.
Then hit CTR Exit to save your work but be sure to leave the name of the file manager.conf unchanged. That’s all there is to it.
Make these changes to manager.conf .
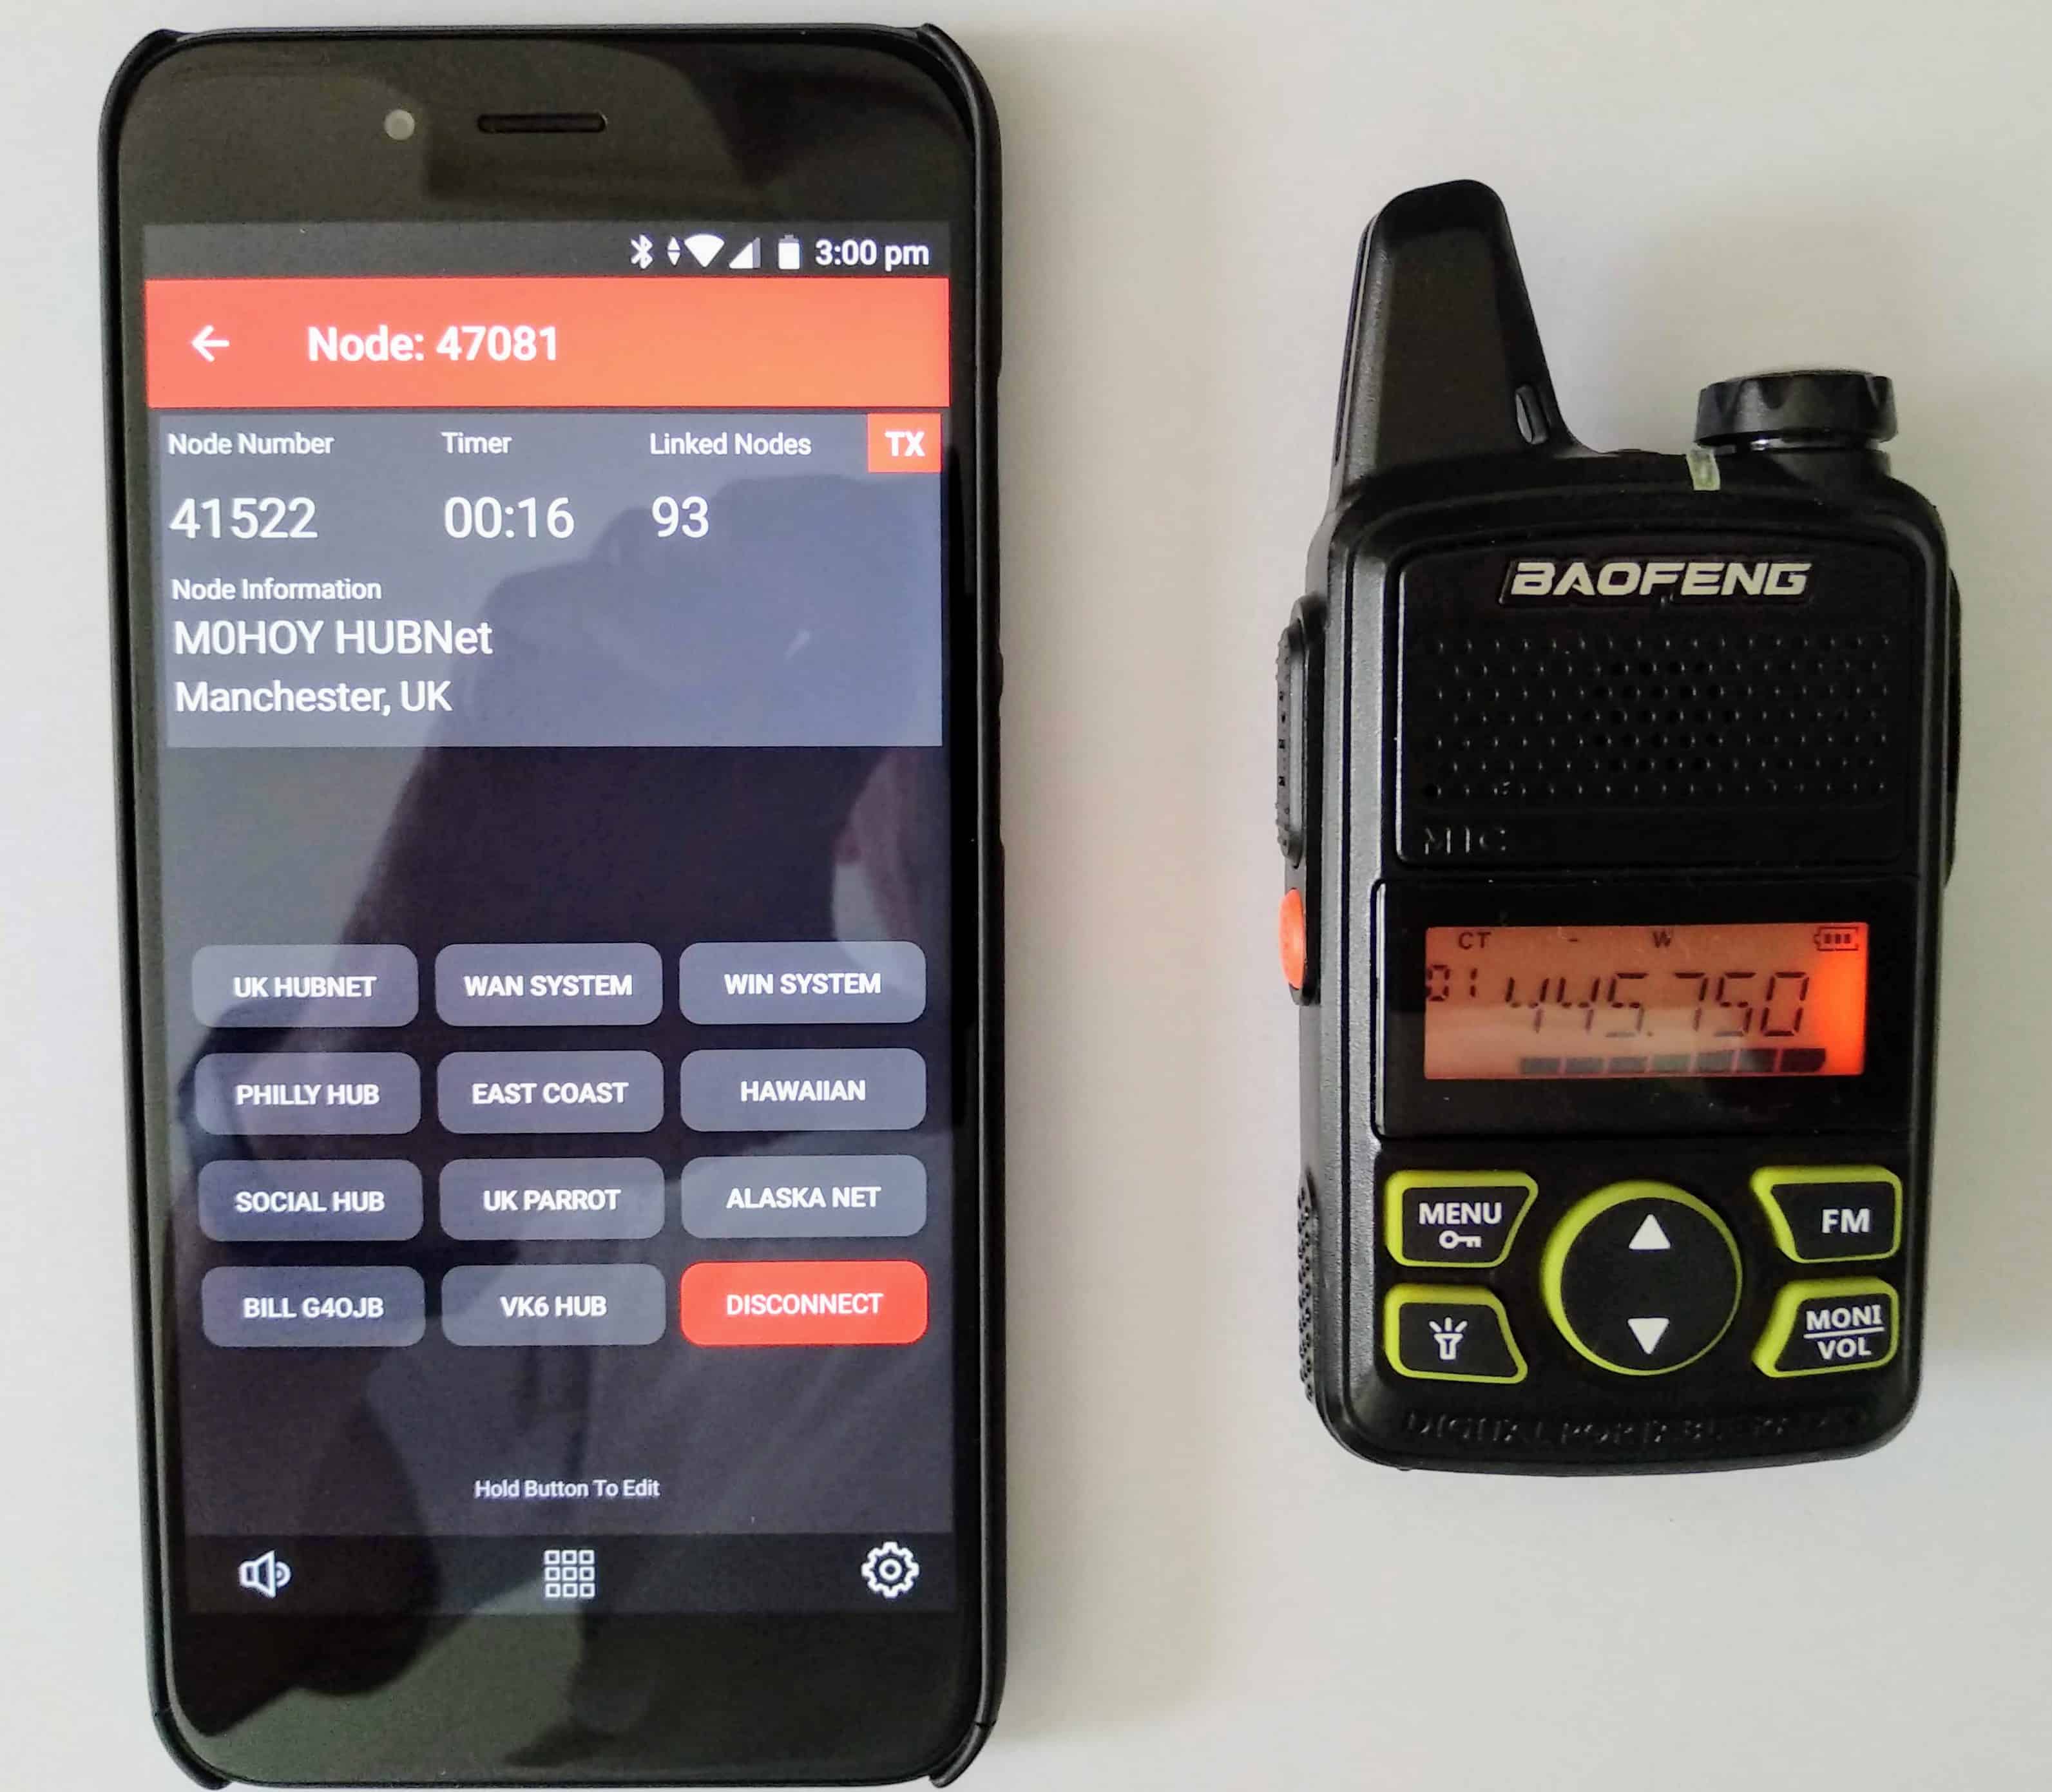
5. Fire up the Node Remote app!
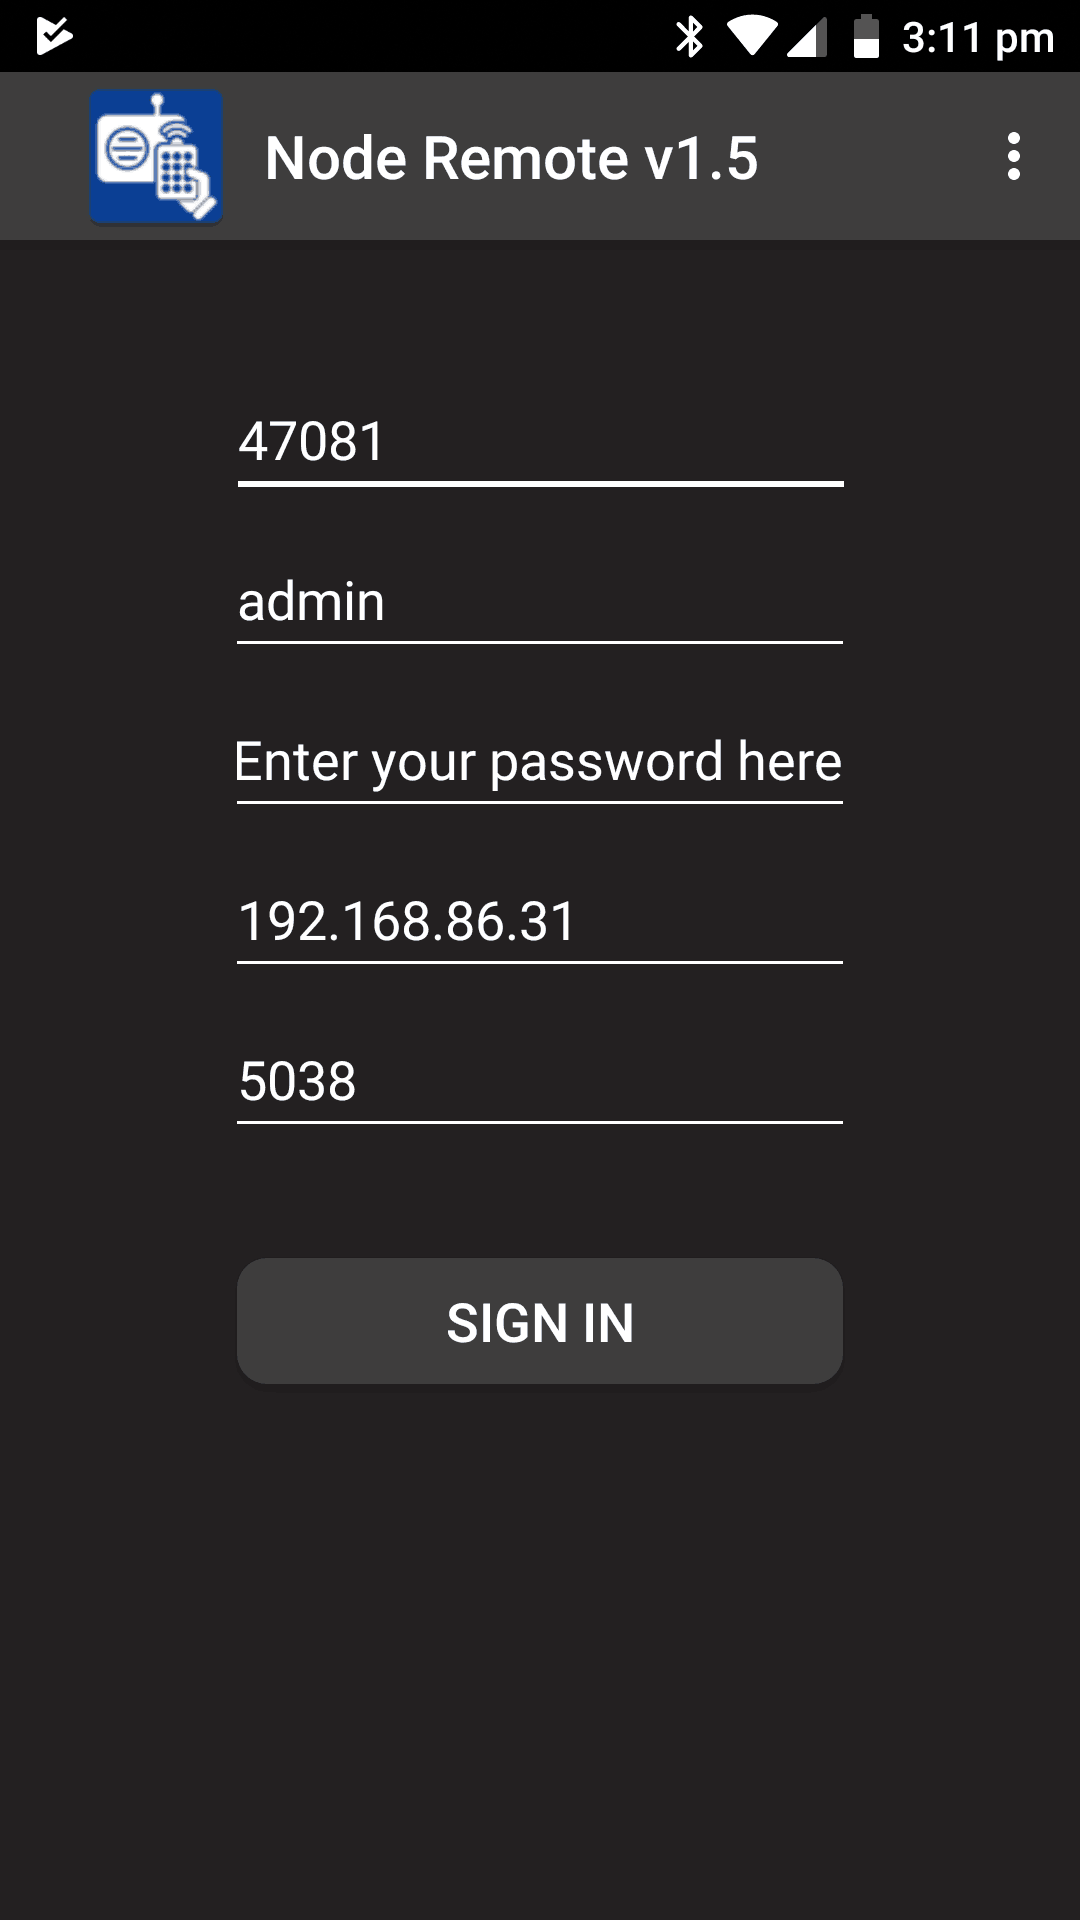
All that remains to be done is to download the Node Remote app, fire it up on your phone, and enter your details. { See the screenshot below }
The first field is your own node number { Mine is 47081 }, leave the second field as admin, enter your password in the third field, the next field is your node’s IP address, but be aware that this can change from time to time. 5038 should be fine in the last field.
Then just sign in and start controlling your node, you will find that it already has a range of Allstar nodes programmed into it for you already, but it is an easy matter to change them and add more.
Click to enlarge.
Your other options.
Also, consider apps like Supermon and iaxrpt, you can find out more about these over at Hamvoip.