
This low-cost construction project should be well within the capabilities of the average radio amateur.
Construction details
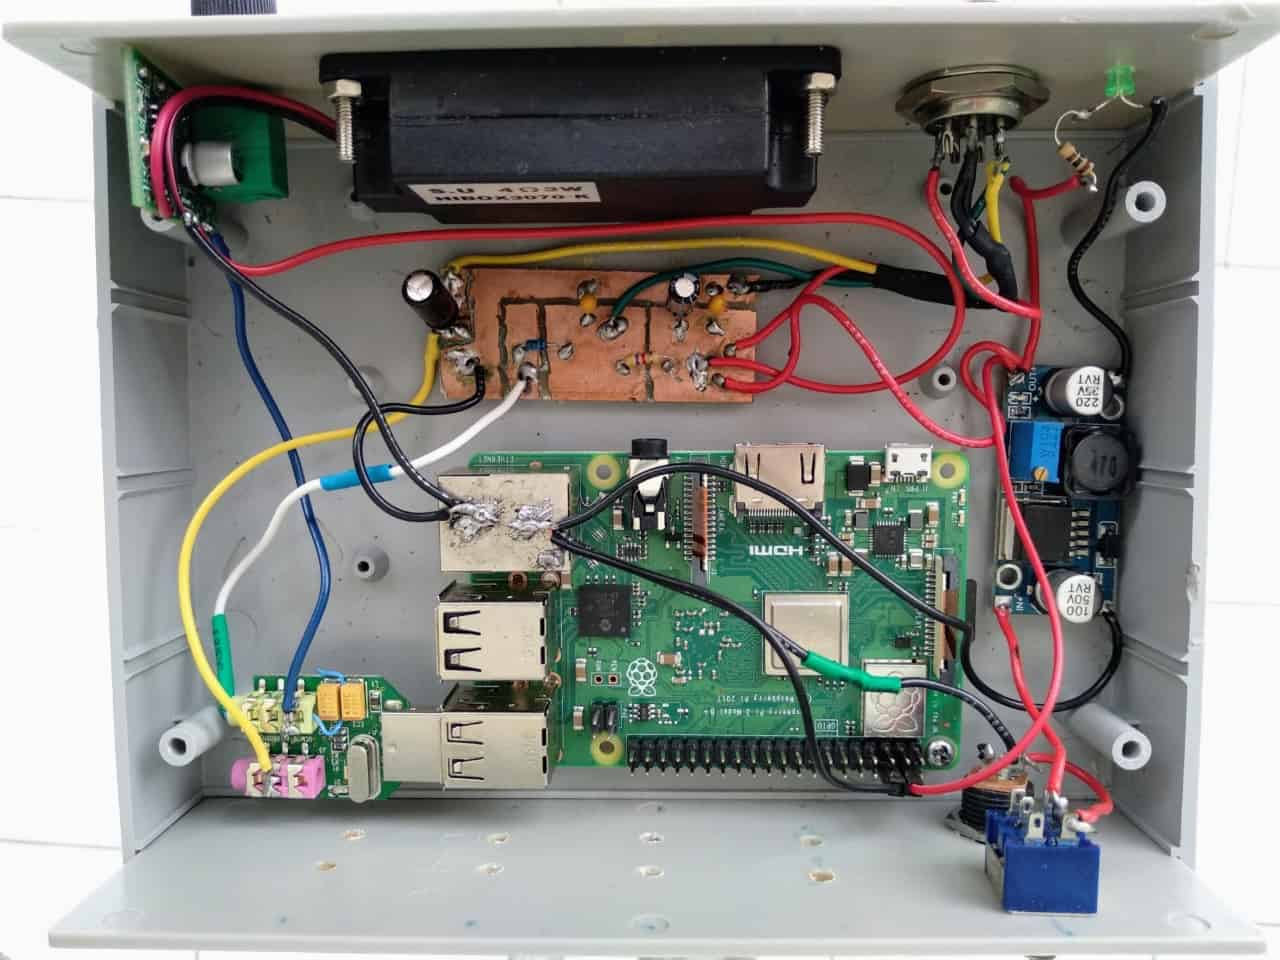
1. The power supply is 5v supplied via a standard buck convertor, this allows a range of voltage inputs. Details in my “More” section on this site.
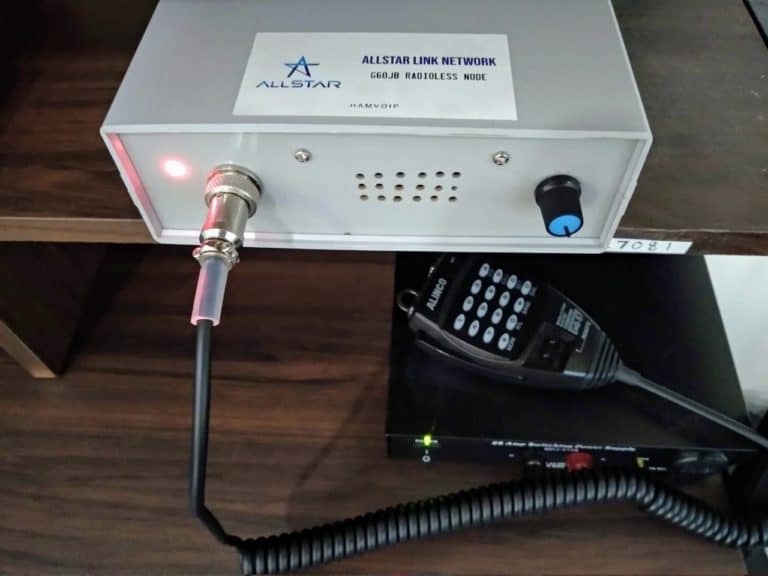
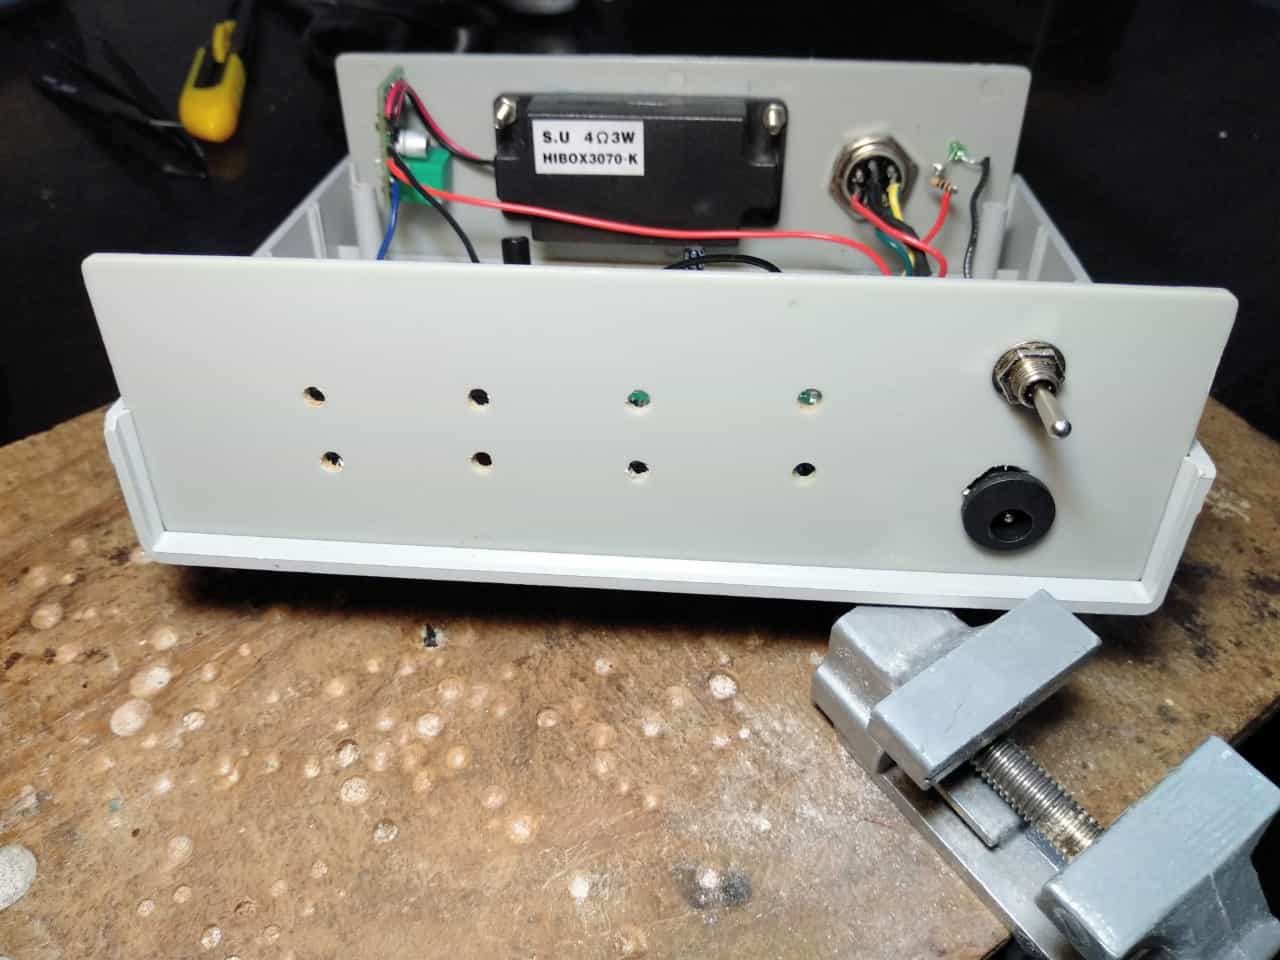
2. The node is contained in a plastic electronic project box { 130x170x55mm } from eBay.
3. While other microphones may well work with this sort of project I went for the Alinco EMS-57. These are available from eBay and elsewhere. You will need the corresponding mike socket of course.
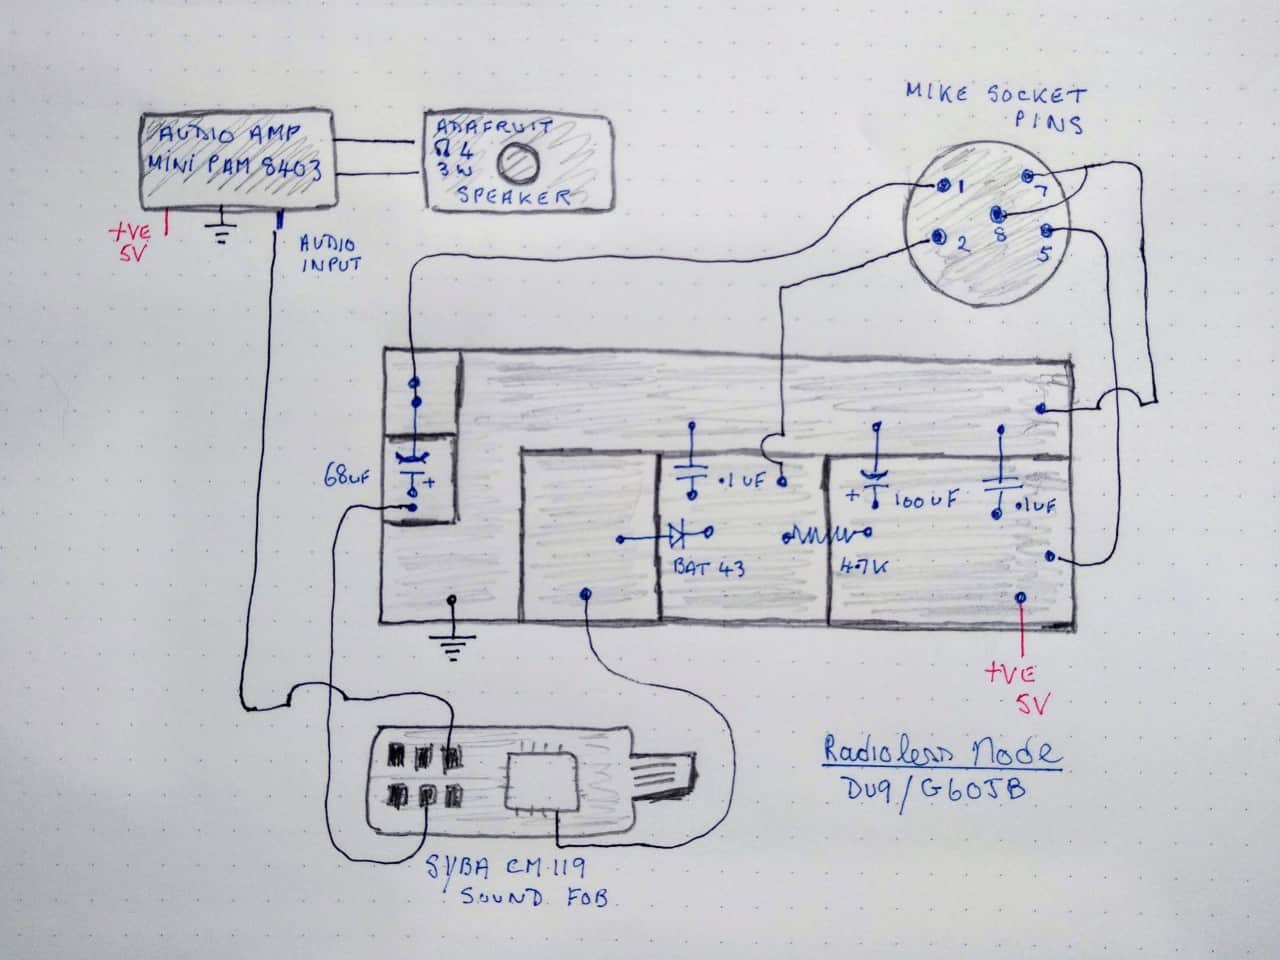
4. The audio amp I used is a Mini-Pam 8403 again these are available from eBay, Amazon and elsewhere. And the speaker in my node is from Adafruit.
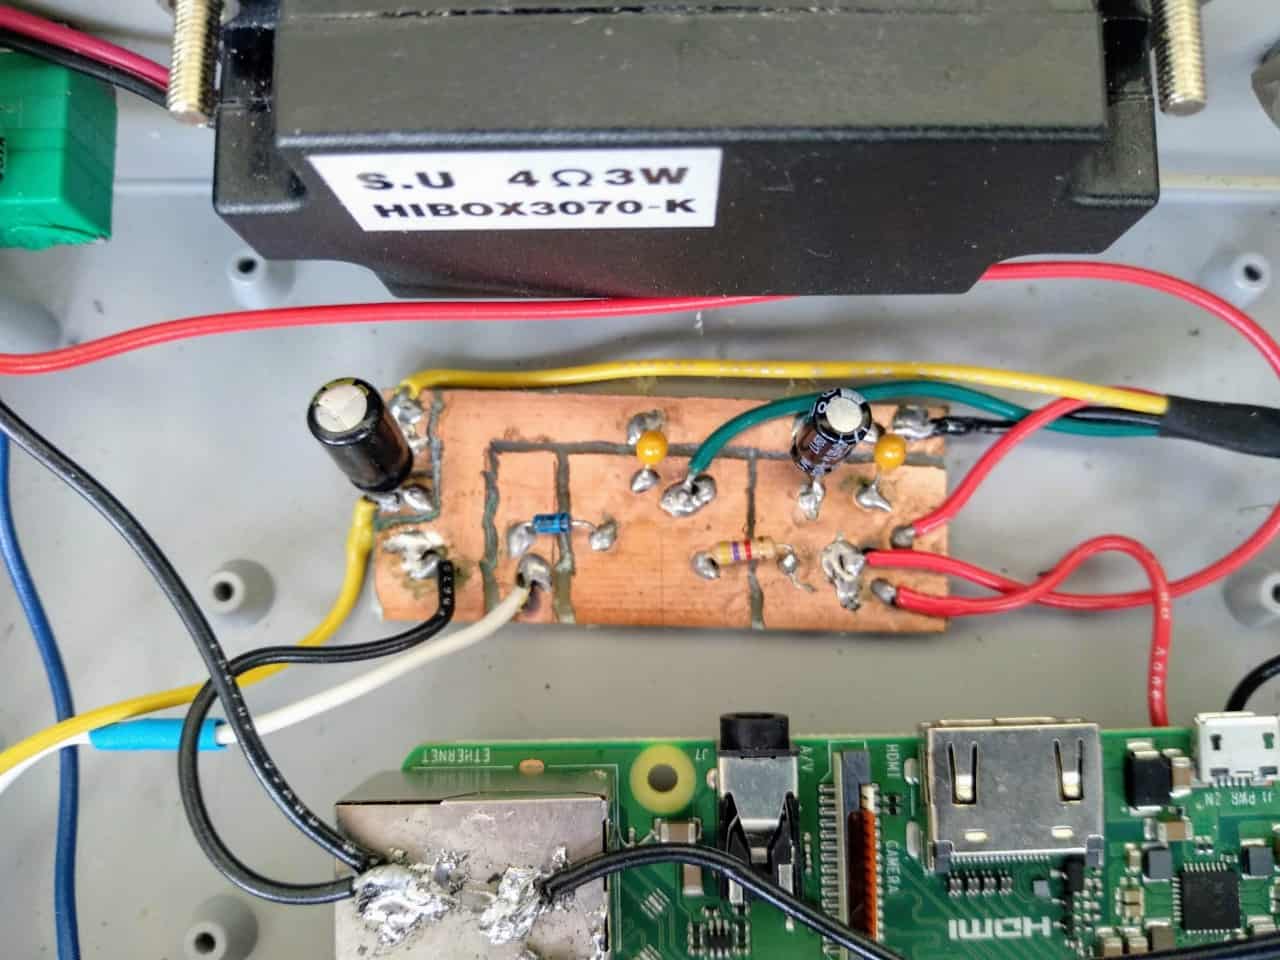
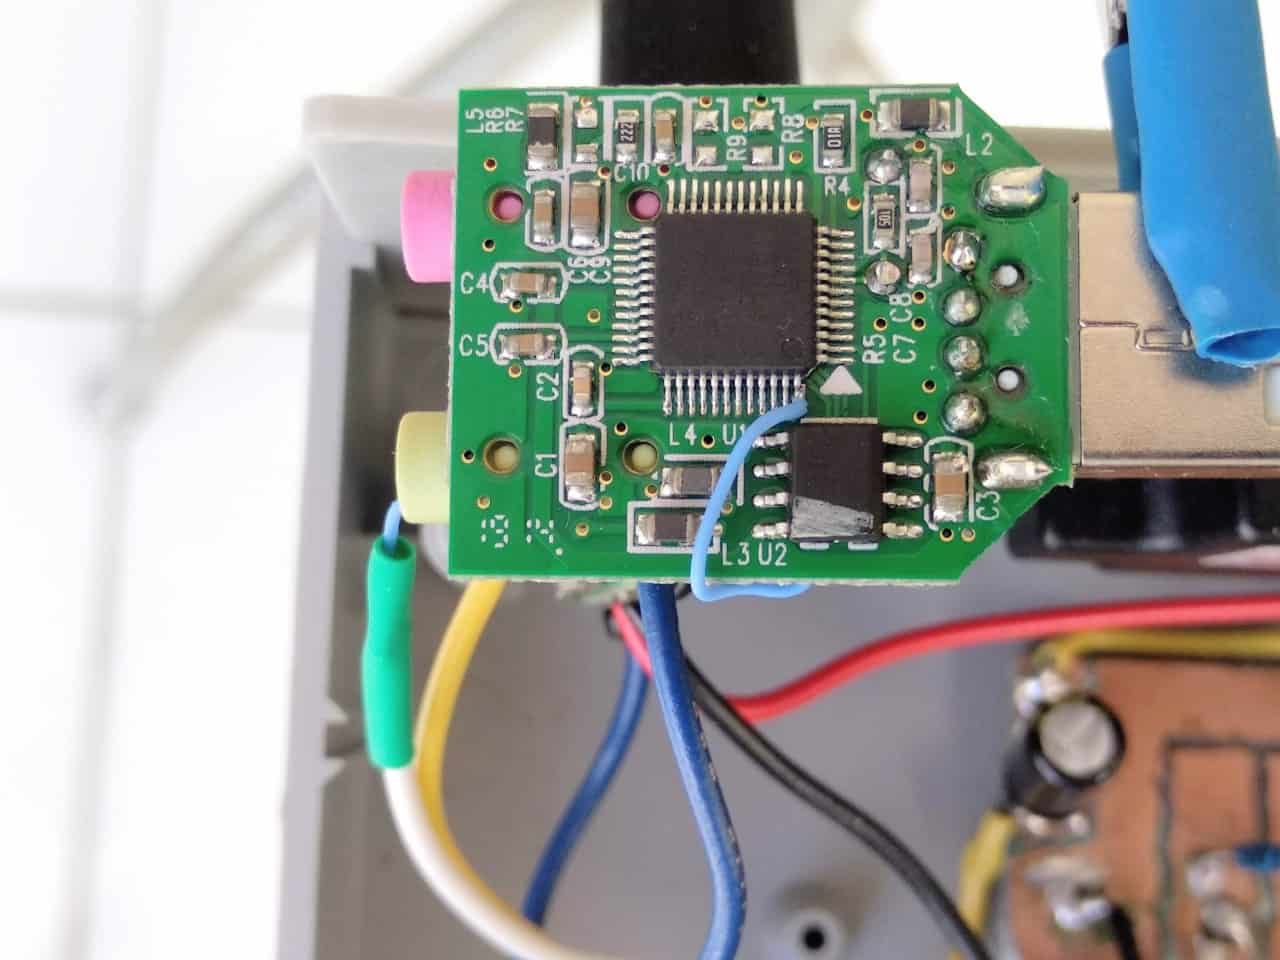
5. Rather than the usual CM108 sound fob I have gone for the Syba CM119, it is easy to convert and it fired up first time for me. The only modification needed is to remove the R6 resistor, this will just float off if you apply some heat with your soldering iron. { See photo below } The Syba fob comes with plastic housing, but this is very easy to remove. If you follow this link you can see what one looks like: LINK
6. The one slightly demanding soldering is to attach the wire to the correct IC chip leg { See photo }. But having the correct type of wire to attach to the pins on the IC chip makes things much easier. I use 30 AWG sold silver-plated copper Kynar wire. You can get this from eBay. Of course, other types of wire are suitable, but make sure it is thin.
Just cut your wire to size first, tin it well, apply flux, then hold it against the correct IC pin and apply 1 – 2 seconds of heat from your soldering iron, that should be enough to attach it properly.
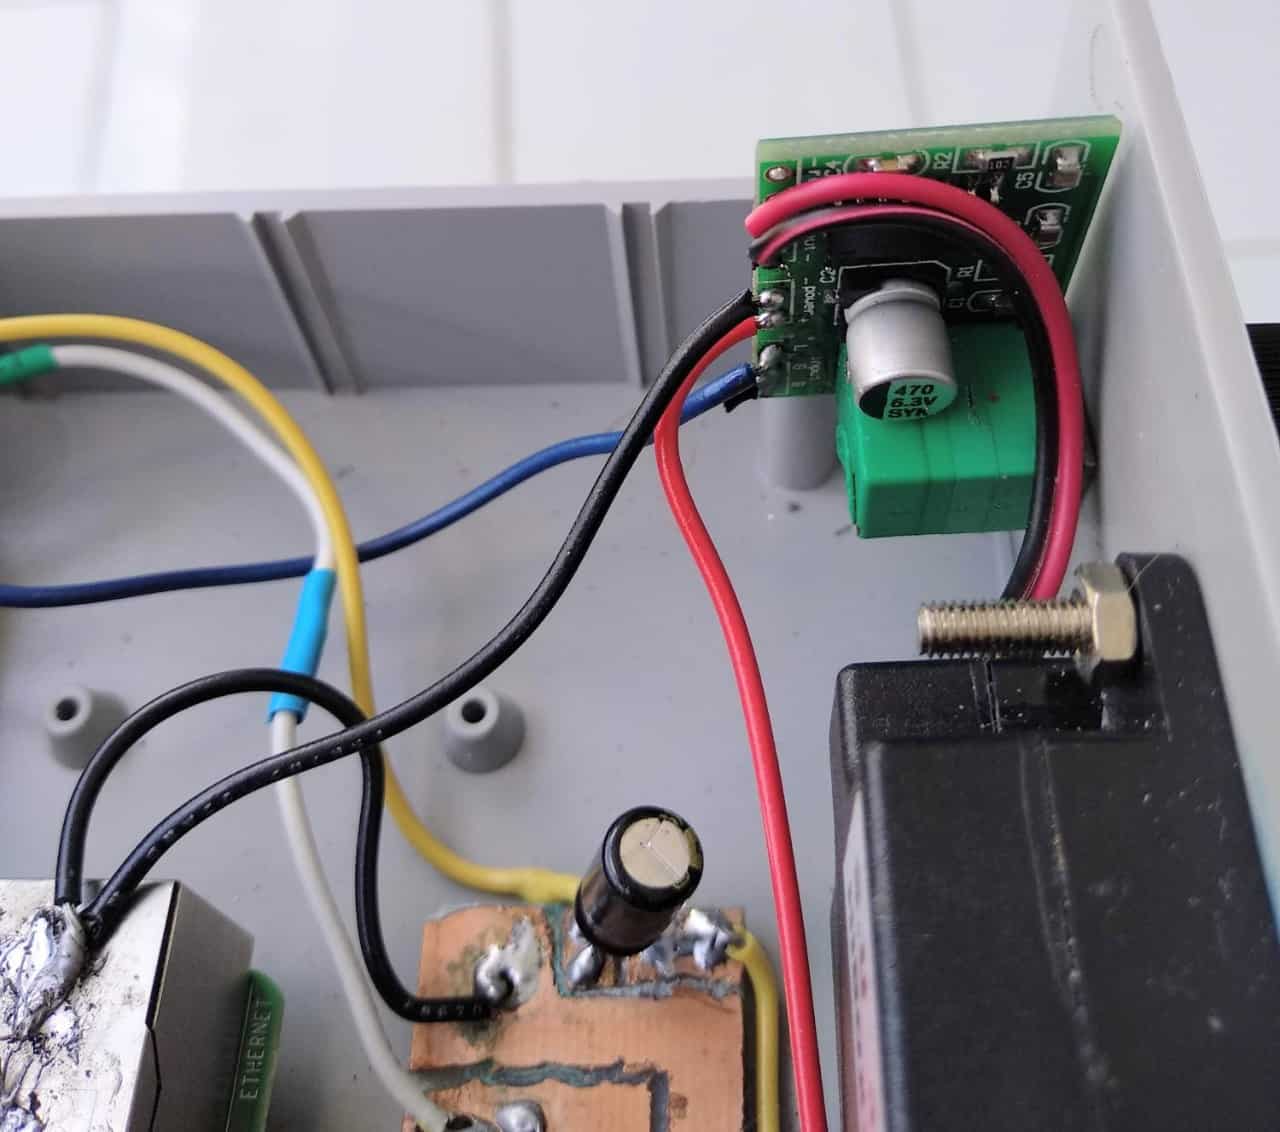
7. The actual wiring of the node is simple, if you study my interior view above and the rough schematic then that should be easy for you to follow.
8. If you bring all the ground wires to one common point on the Rpi you will have a fighting chance of avoiding ground loop hums which are the bane of node builders.
9. The only indicator light is the power-up LED { 100k resistor } I find the other indicator lights are superfluous in a radioless node since you can hear what is going on anyway. Plus if you use the excellent Node Remote app to control your node then you will know where you are connected to. More details in my “More” section.
10. I like the single-sided copper board construction as it leads to a more robust finished node. But this type of design could equally as well be put together with perf board or Veroboard.
11. My node runs on the latest Hamvoip software, just choose the generic node option when you load it on to the SD cards. Plug and play!
Scott Nimmo DU9/G6OJB
I would like to acknowledge the help and advice I received from Paul VE1DY in relation to this project. I am grateful for his expertise.

Other radioless Allstar nodes on the web.
1. You can buy a ready to go radioless Allstarnode from Techno By George, he also sells other interesting Allstar items: LINK
2. Another option is to buy Radio-Less adapter from allstarnodes dot com. Many people favour these for mobile use: LINK
3. WM4B has an informative site with a lot of useful information on how you can construction a radioless Allstar node yourself: LINK
4. Doug has a good article over on Hamvoip which covers how to build a radioless Allstar node.