Step One: Modify a Baofeng 888s radio as per the instructions elsewhere on this site.
Step Two: Carry out the low power mode as detailed in my ” More ” section. Just keep things simple, remove the inductor to the right of the final stage transistor. This will take you about 10 seconds. LINK
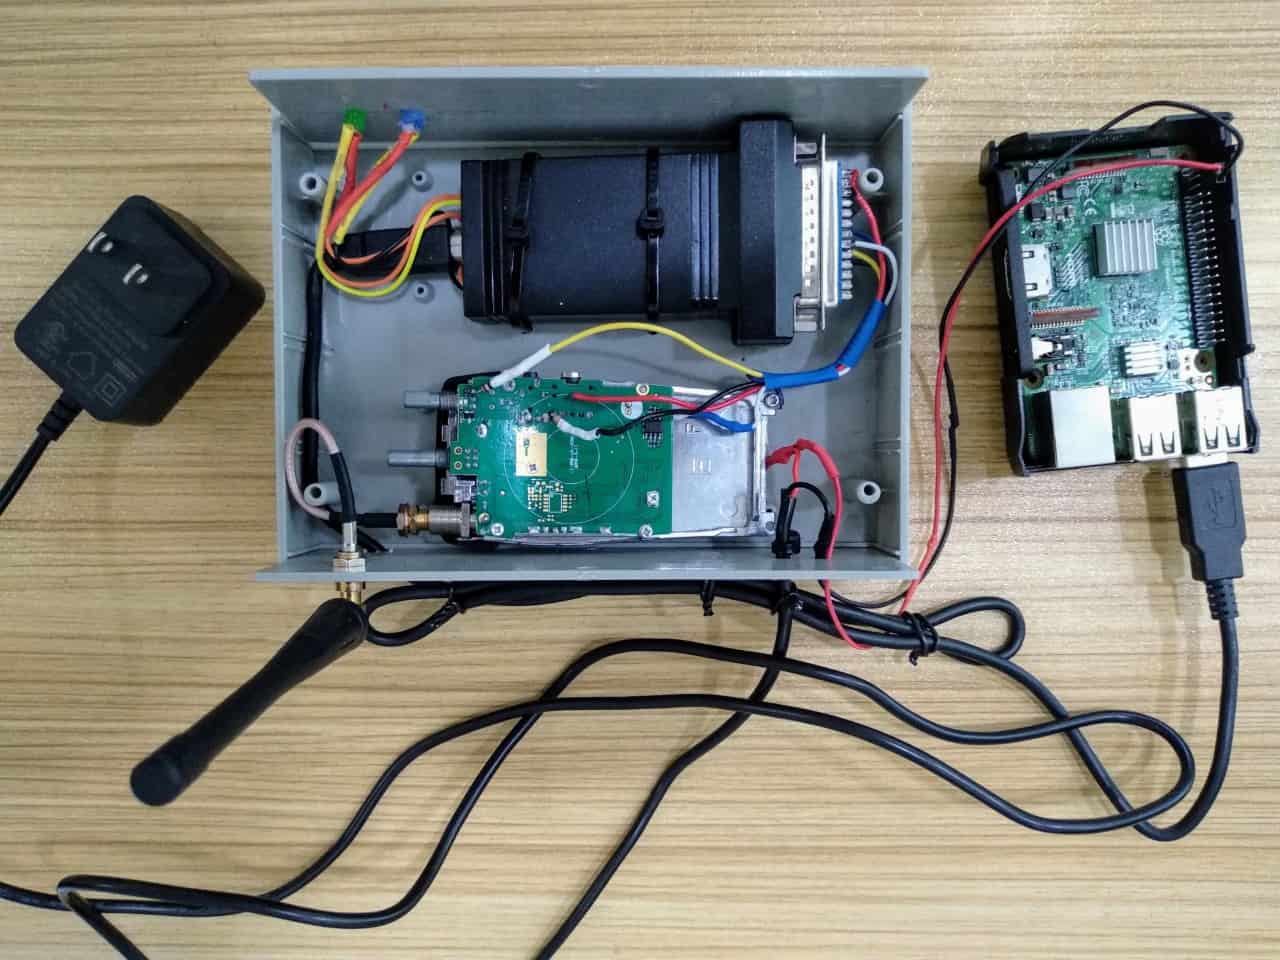
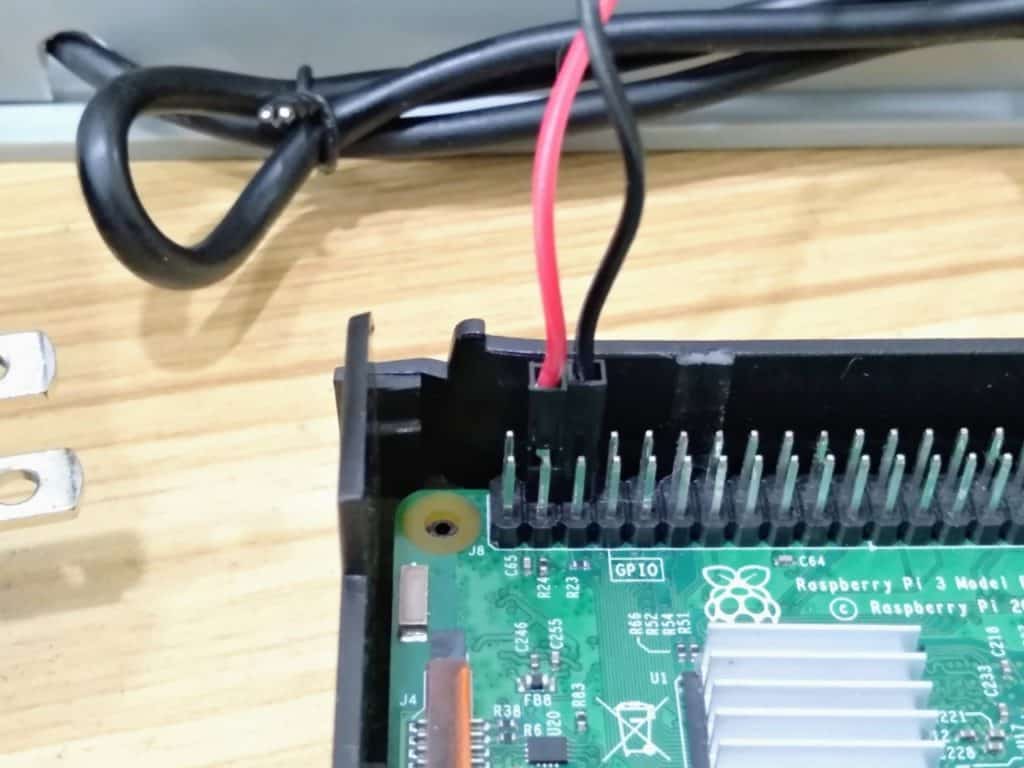
Step Three: Set up the power supply, for this project I have used a Raspberry Pi 4 power supply. Cut off the connector and bare the wires, then one positive lead and one negative lead go to the Raspberry Pi 3 B, and a branch from the positive lead goes to the diode supplying the positive power input to the Baofeng 888s, that’s all you need. LINK
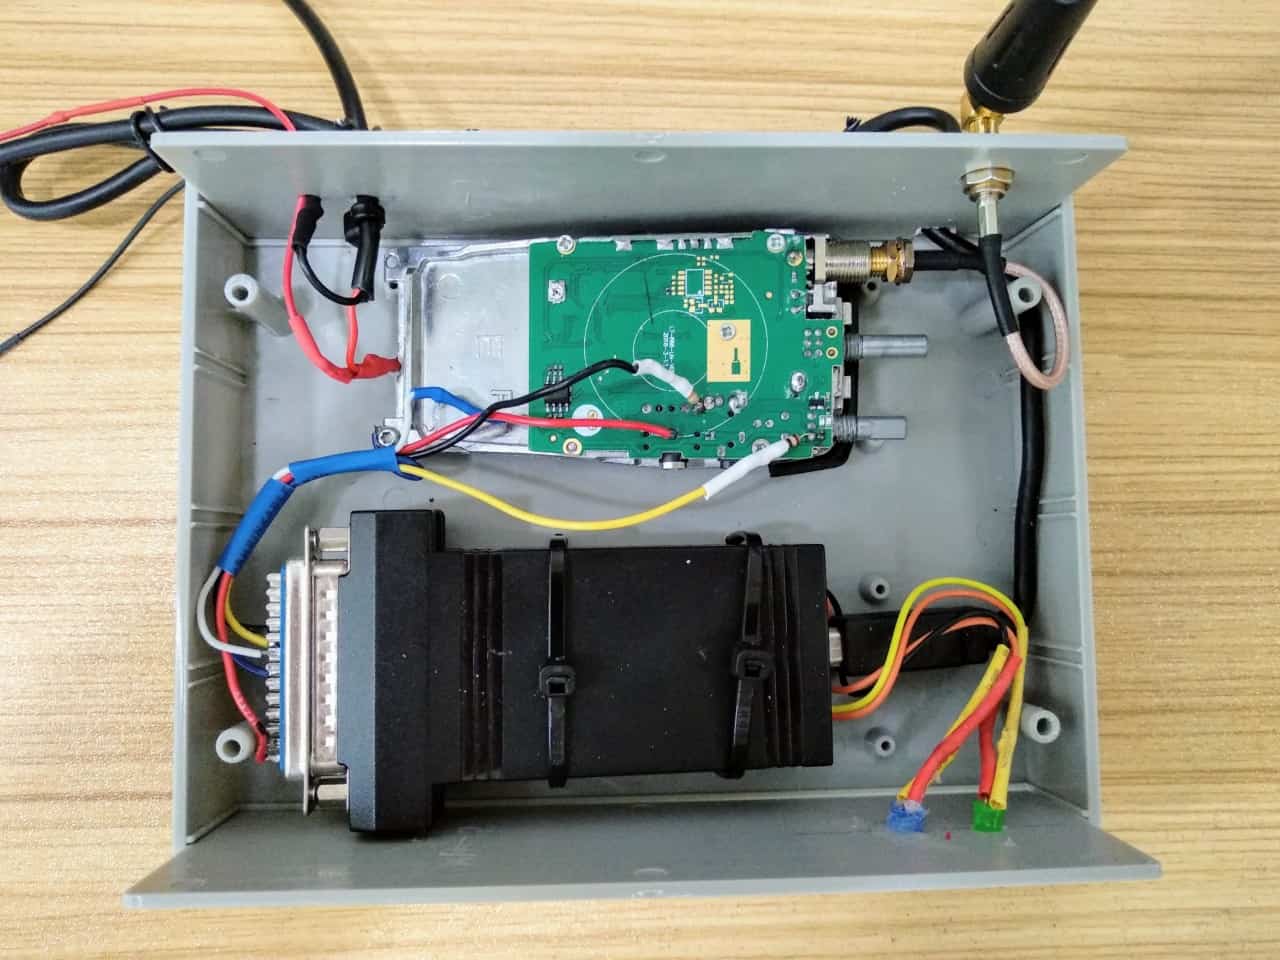
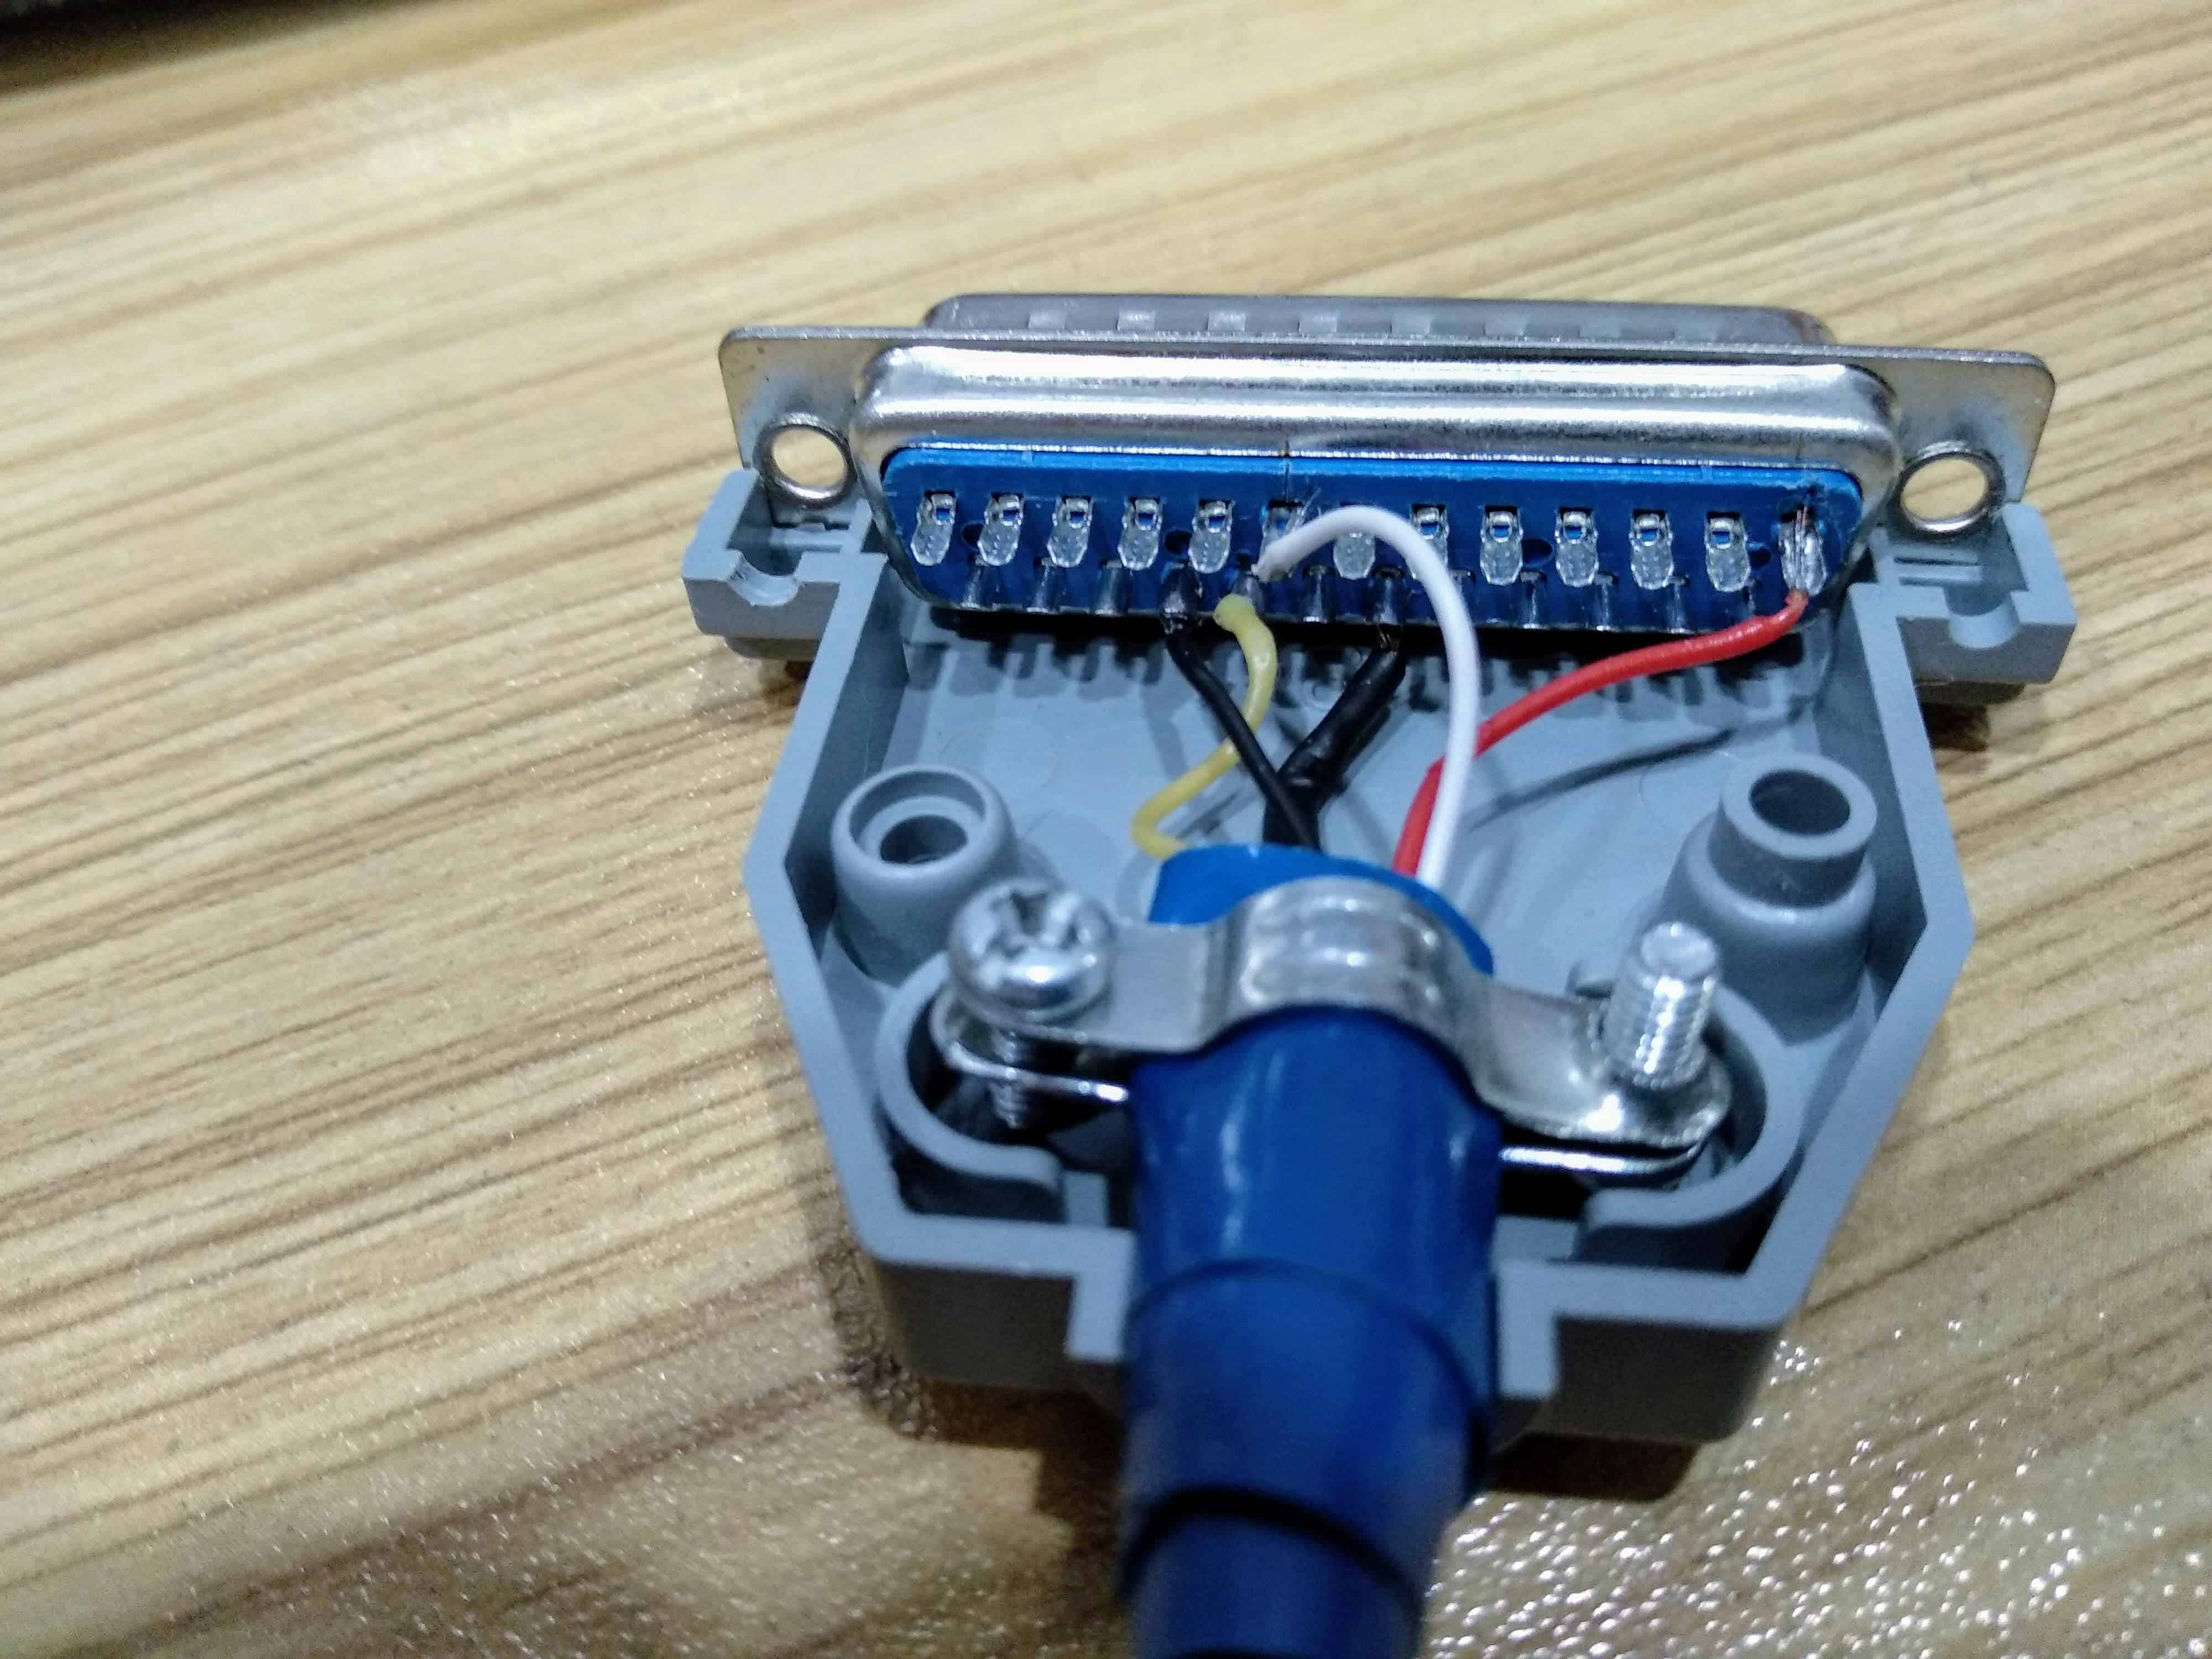
Step four: Wire up the DB25 connector as per this diagram, { The casing is not required } the ground lead just fixes to the screw at the very bottom of the Baofeng 888s: LINK
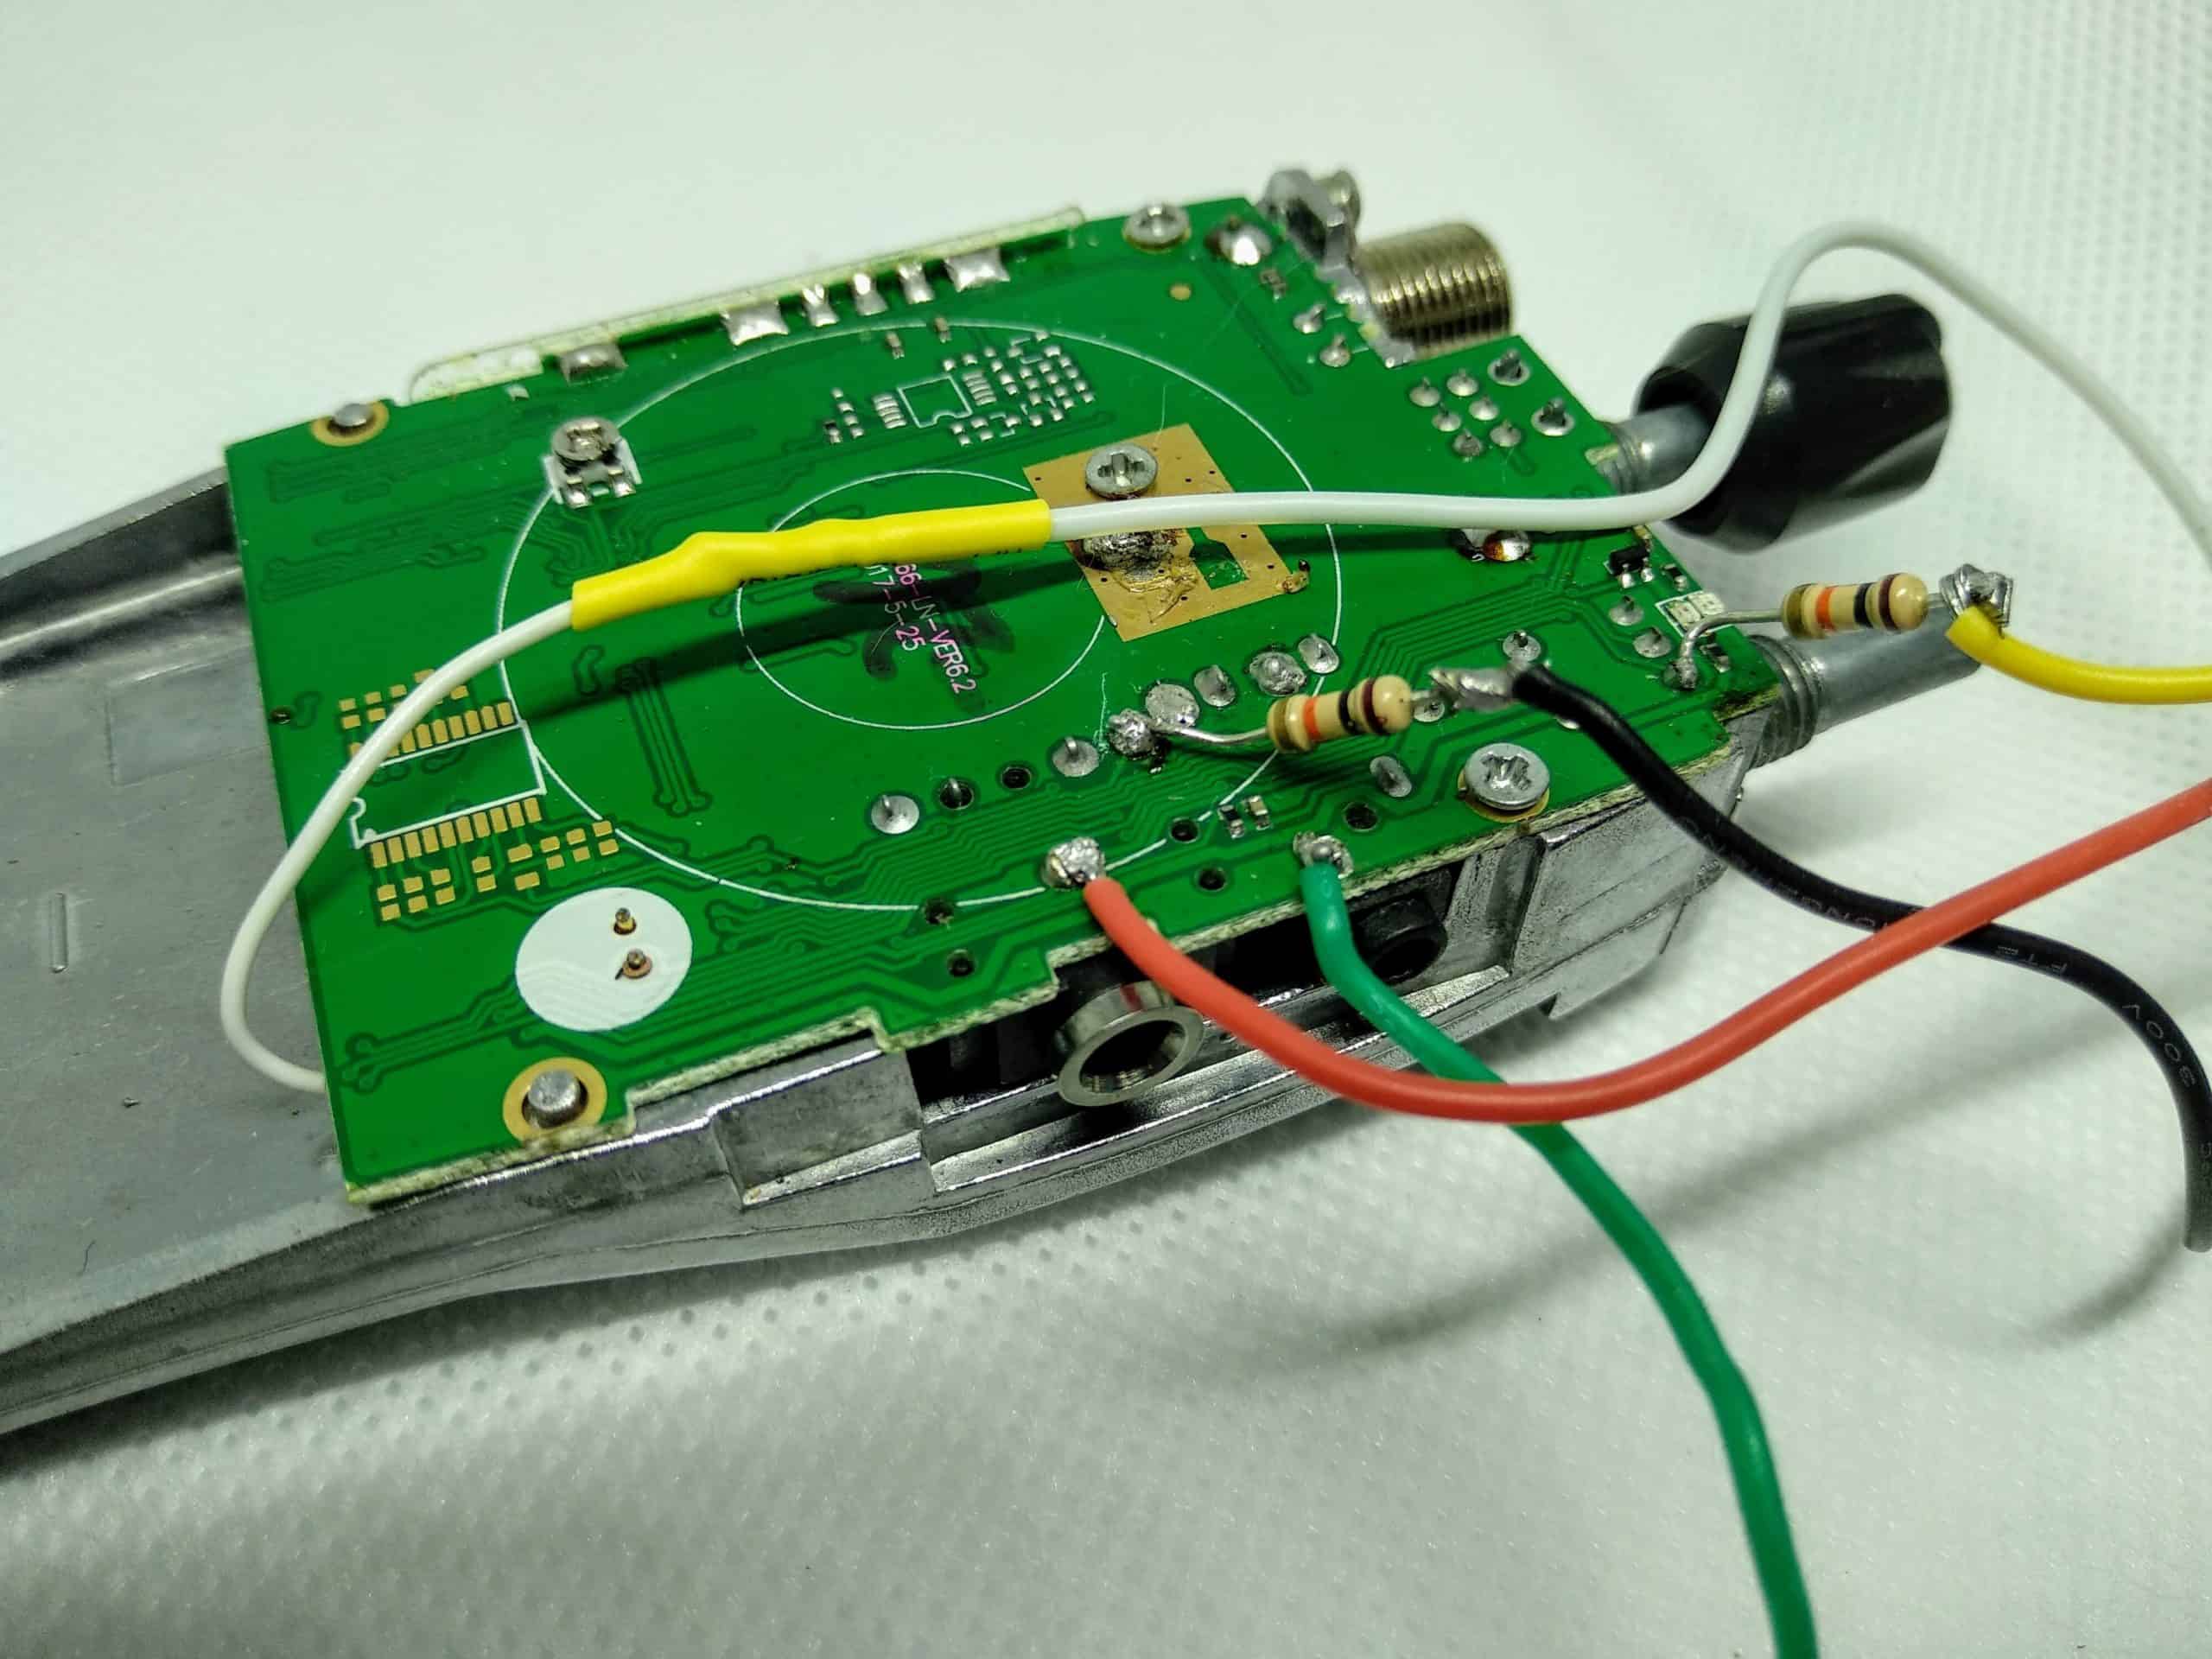
Step Five: Then connect up the DB25 connector to the Baofeng 888s as per the photo above, the resistors are both 10K.
Finally the USB lead from the DMK URI goes to the Raspberry Pi.
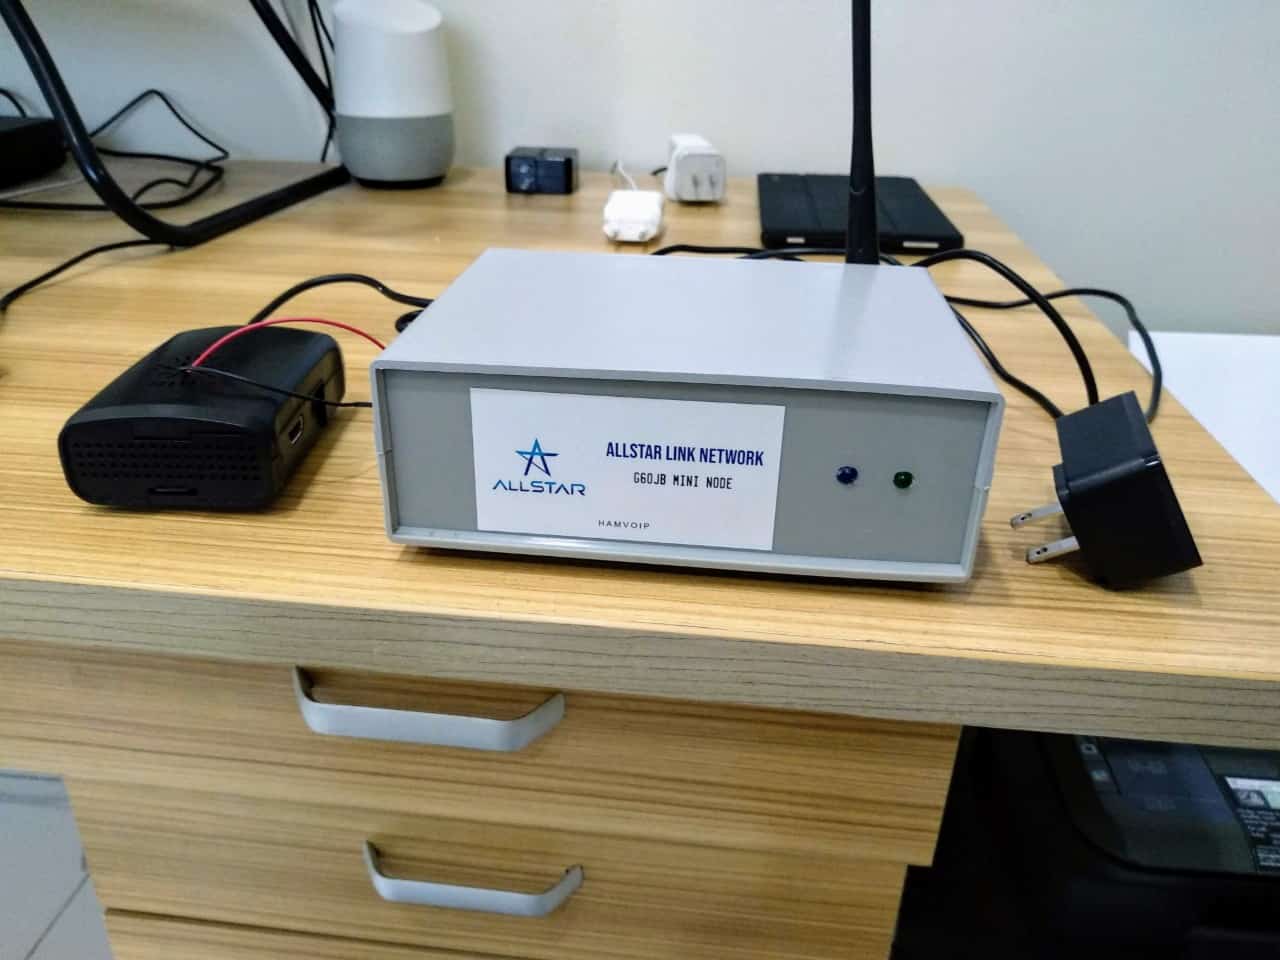
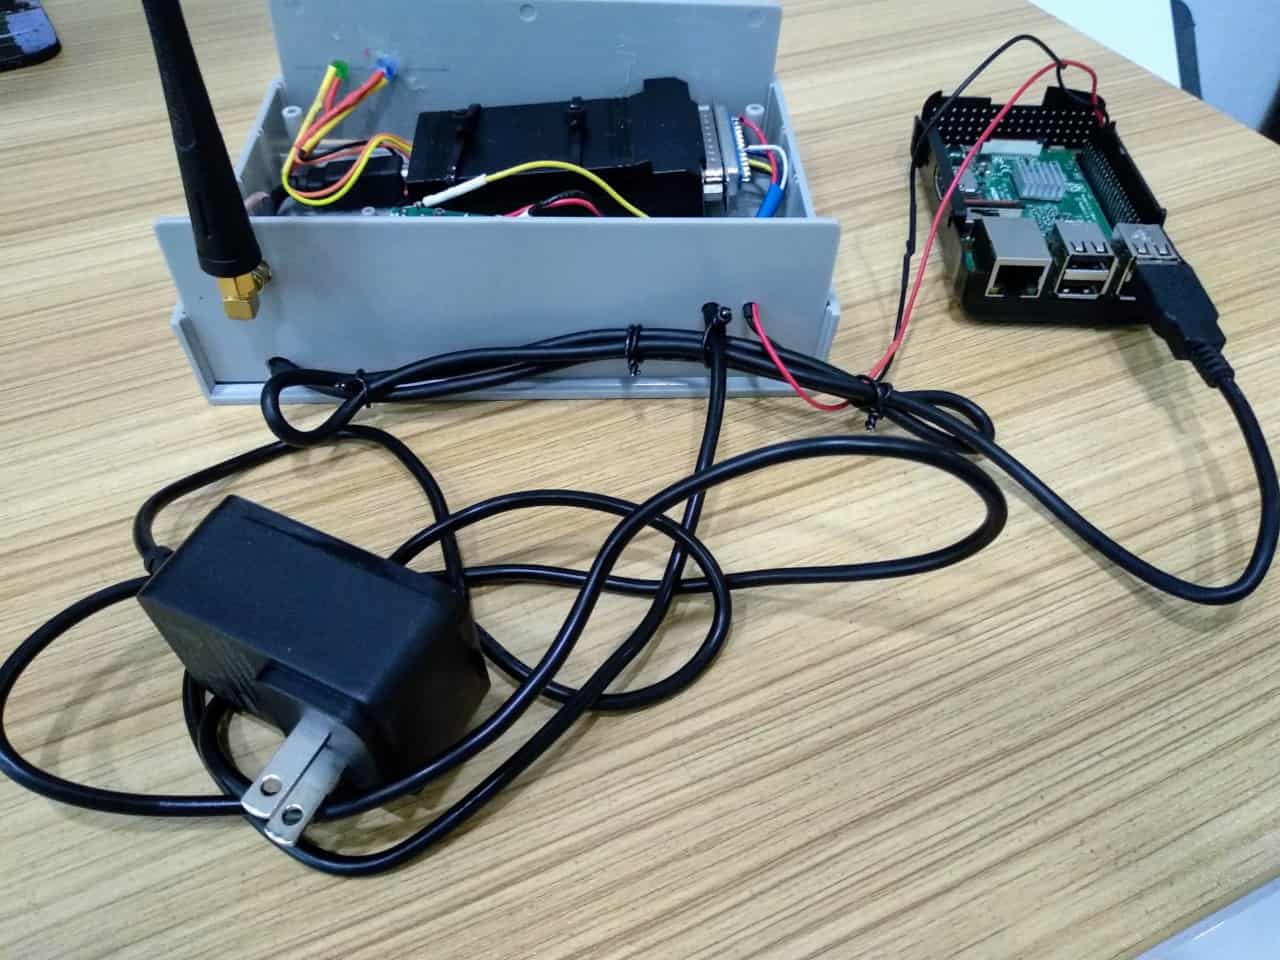
This node is built in a plastic electronic project box { 130 x 170 x 55mm } from eBay. I have used this as I have a few of them lying about. That said it would be very easy to fit the whole project including the Raspberry Pi 3 into a larger project box. However, I have an idea that using a Raspberry Pi separated from the rest of the node might lead to better audio quality.
The indicator lights: I guess no Allstar node is complete without indicator lights on the front. It is an easy matter just to solder on a couple of wires to extend the LEDs on the DMK URI.
Software: Once you have completed the hardware construction you can move on to installing the required software on to the SD card in the Raspberry Pi to get your node up and running. While there are other options I find that Hamvoip software is your easiest option at the moment.
Details in my More section.