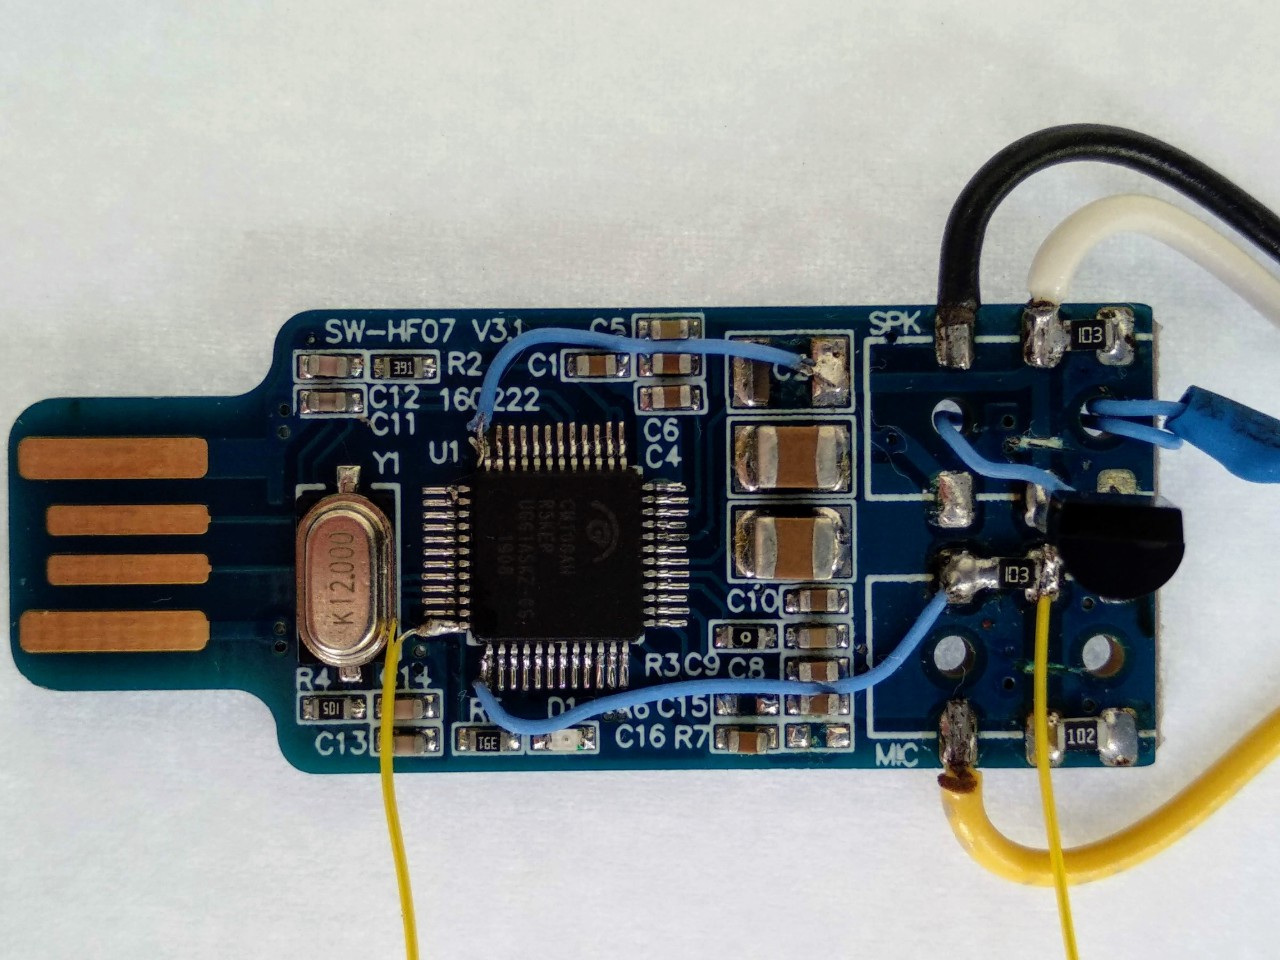
How to add indicator LEDs to a CM108 based Allstar node.
A simple way to add indicator lights to an Allstar Node. { No coding }
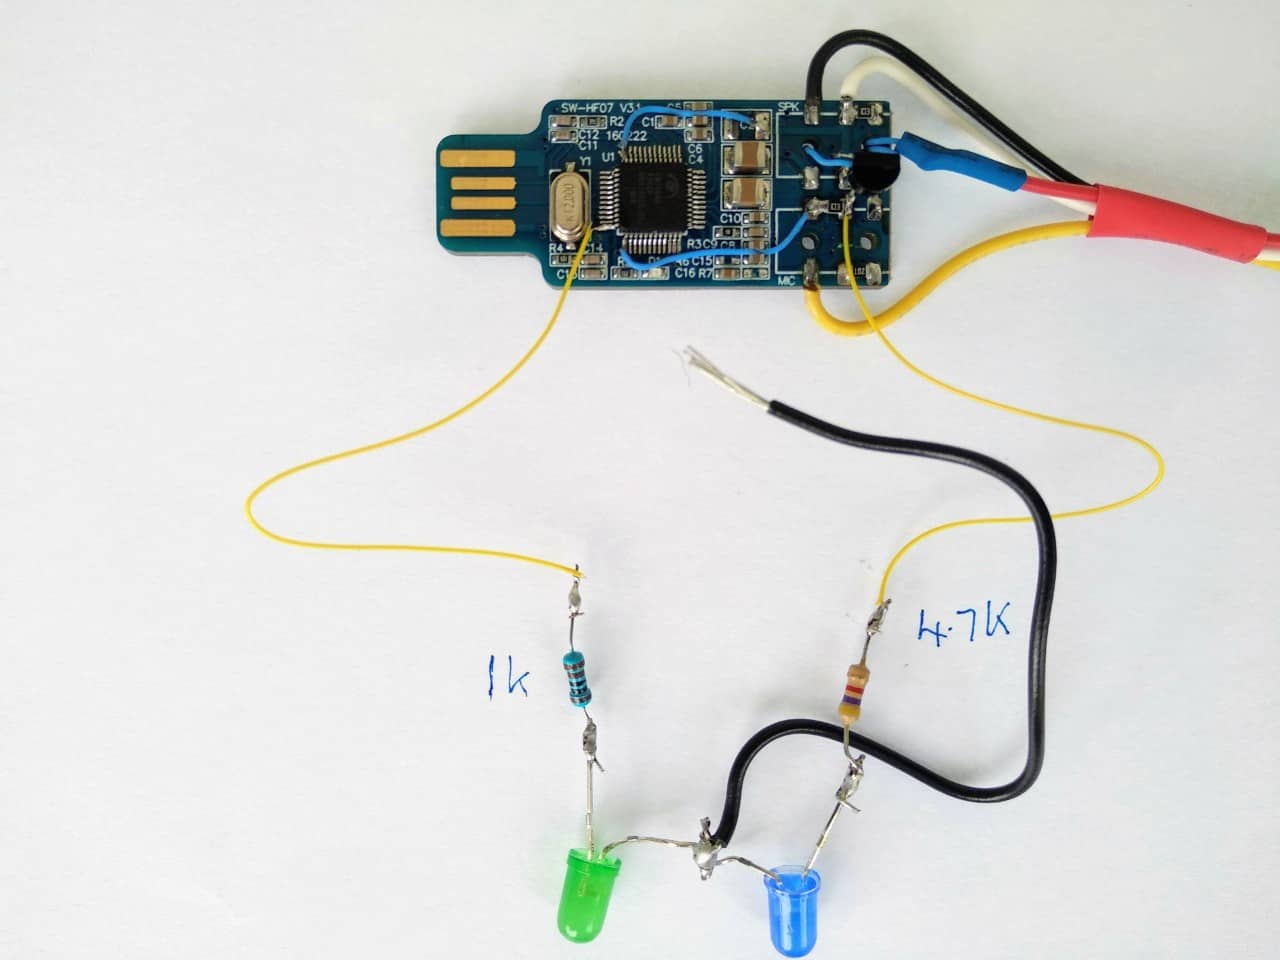
The two thin yellow wires have been added. - Please click to enlarge.
Subtle changes occur from time to time in the design of the radios and the fobs and the Hamvoip software. I am aware that now, in some cases the thin yellow wire on the right may need to be connected at the other side of the 10 K surface mount resistor. On the same solder pad as the blue PTT wire coming from the chip.
Click to enlarge.
This page outlines a simple way to add indicator lights to the front panel of a CM108 based Allstar node.
The blue LED is the PTT indicator and the green one is the blinking ” keep alive ” LED.
The black wire goes to ground on the body of the Rpi.
This setup is particularly suited to my Classic CM108 based Allstar Node Design. :LINK
Be aware that it is also possible to connect Tx and Rx indicator lights on the Raspberry Pi itself via the GPOI pins. This, however, does demand quite a high degree of coding ability and so is outwith the scope of this Allstar for beginners website.