
How to set up Hamvoip software for your Allstar node.
Having assembled your Allstar node hardware you are going to need software of some kind to get it up and running. While there are other options, in my opinion, the Hamvoip software is by far the easiest option for complete beginners at present. Contrary to what you may have heard, with Hamvoip no real knowledge or understanding of Linux is now required, in fact, the present incarnation will almost self-install, setting it up has become a very quick and easy process.
Of course, at a later date, you can delve deeper into the intricacies of the Allstar system, this can be both complex and fascinating, in fact, I would imagine that there are very few people who understand both the software and hardware at the highest levels. However, I have put together a number of nodes now and got them running in a more or less satisfactory manner and what I know about Linux you could write on the back of a postage stamp! So let’s work through the Hamvoip software …
Step One: To set up the Hamvoip software for your node you are going to have to register your new node and obtain your unique node number and a six-digit password. This should be your first step before doing anything as registration can sometimes take a couple of days.
You can do this at https://web-tpa.allstarlink.org
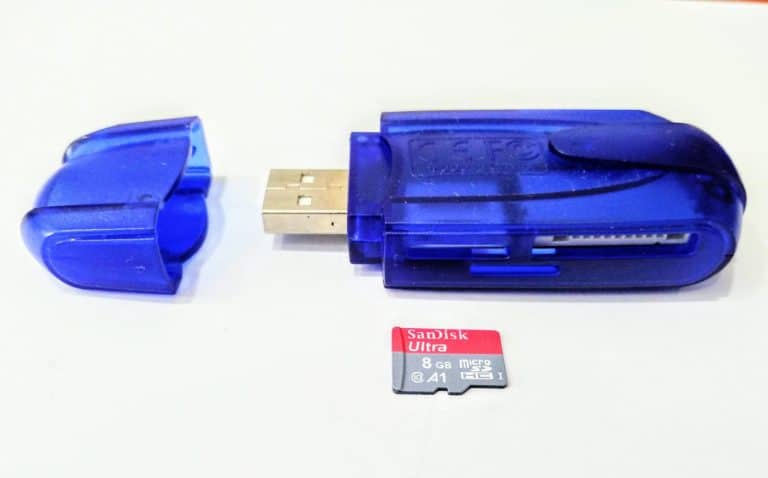
Step Two: Your next step is to place your SD card in your USB SD card reader, plug the reader into your PC and format the card using SD Card Formatter app. { Please note you need this sort of special software to format an SD card, the normal PC type formatting will not work. } An 8 GB SD card works OK, but for all the extra cost why not use a 16 GB one?
Step Three: Now download the latest Hamvoip image from https://hamvoip.org/#download the self-extracting exe is best, extract it and note which directory on your PC it ends up in, making a new ” Allstar ” directory, for example, is a good idea.
Step Four: Plug the USB card reader into your computer with the formatted SD card inside it, and then transfer ” burn ” the Hamvoip image you previously downloaded on to your SD card using Win32DiskImager software.
Step Six: When you boot up for the first time and it has finished it’s initial startup routine the first thing you will see is a command prompt. Where it asks for a login username use “ root ” and the same for the password ” root ” { Both lowercase }.
Then run the ” first setup option”, login is again root and change the password when prompted to something you will remember. This what you will use from now on.
Set up your time zone, use the spacebar to choose your particular zone.
Then work through and reboot when this option pops up.
When asked log back in again using ” root ” and then your new password.
Then just work through the final installation following the prompts on the screen, please don’t worry if you are not sure what some of these settings mean, the ones you want will have already been highlighted in blue for you in any case.
But look out for the following points : For the radio selection, choose ba-666, this fine for the Baofeng 888s and the other thing to watch is to be sure to choose Voice Ident rather than the CW Ident option. When prompted set up an IAXRPT password, this will come in handy later. You will also have the option to set up a WIFI connection for your node, most people will choose this option although you stay with ethernet if you want.
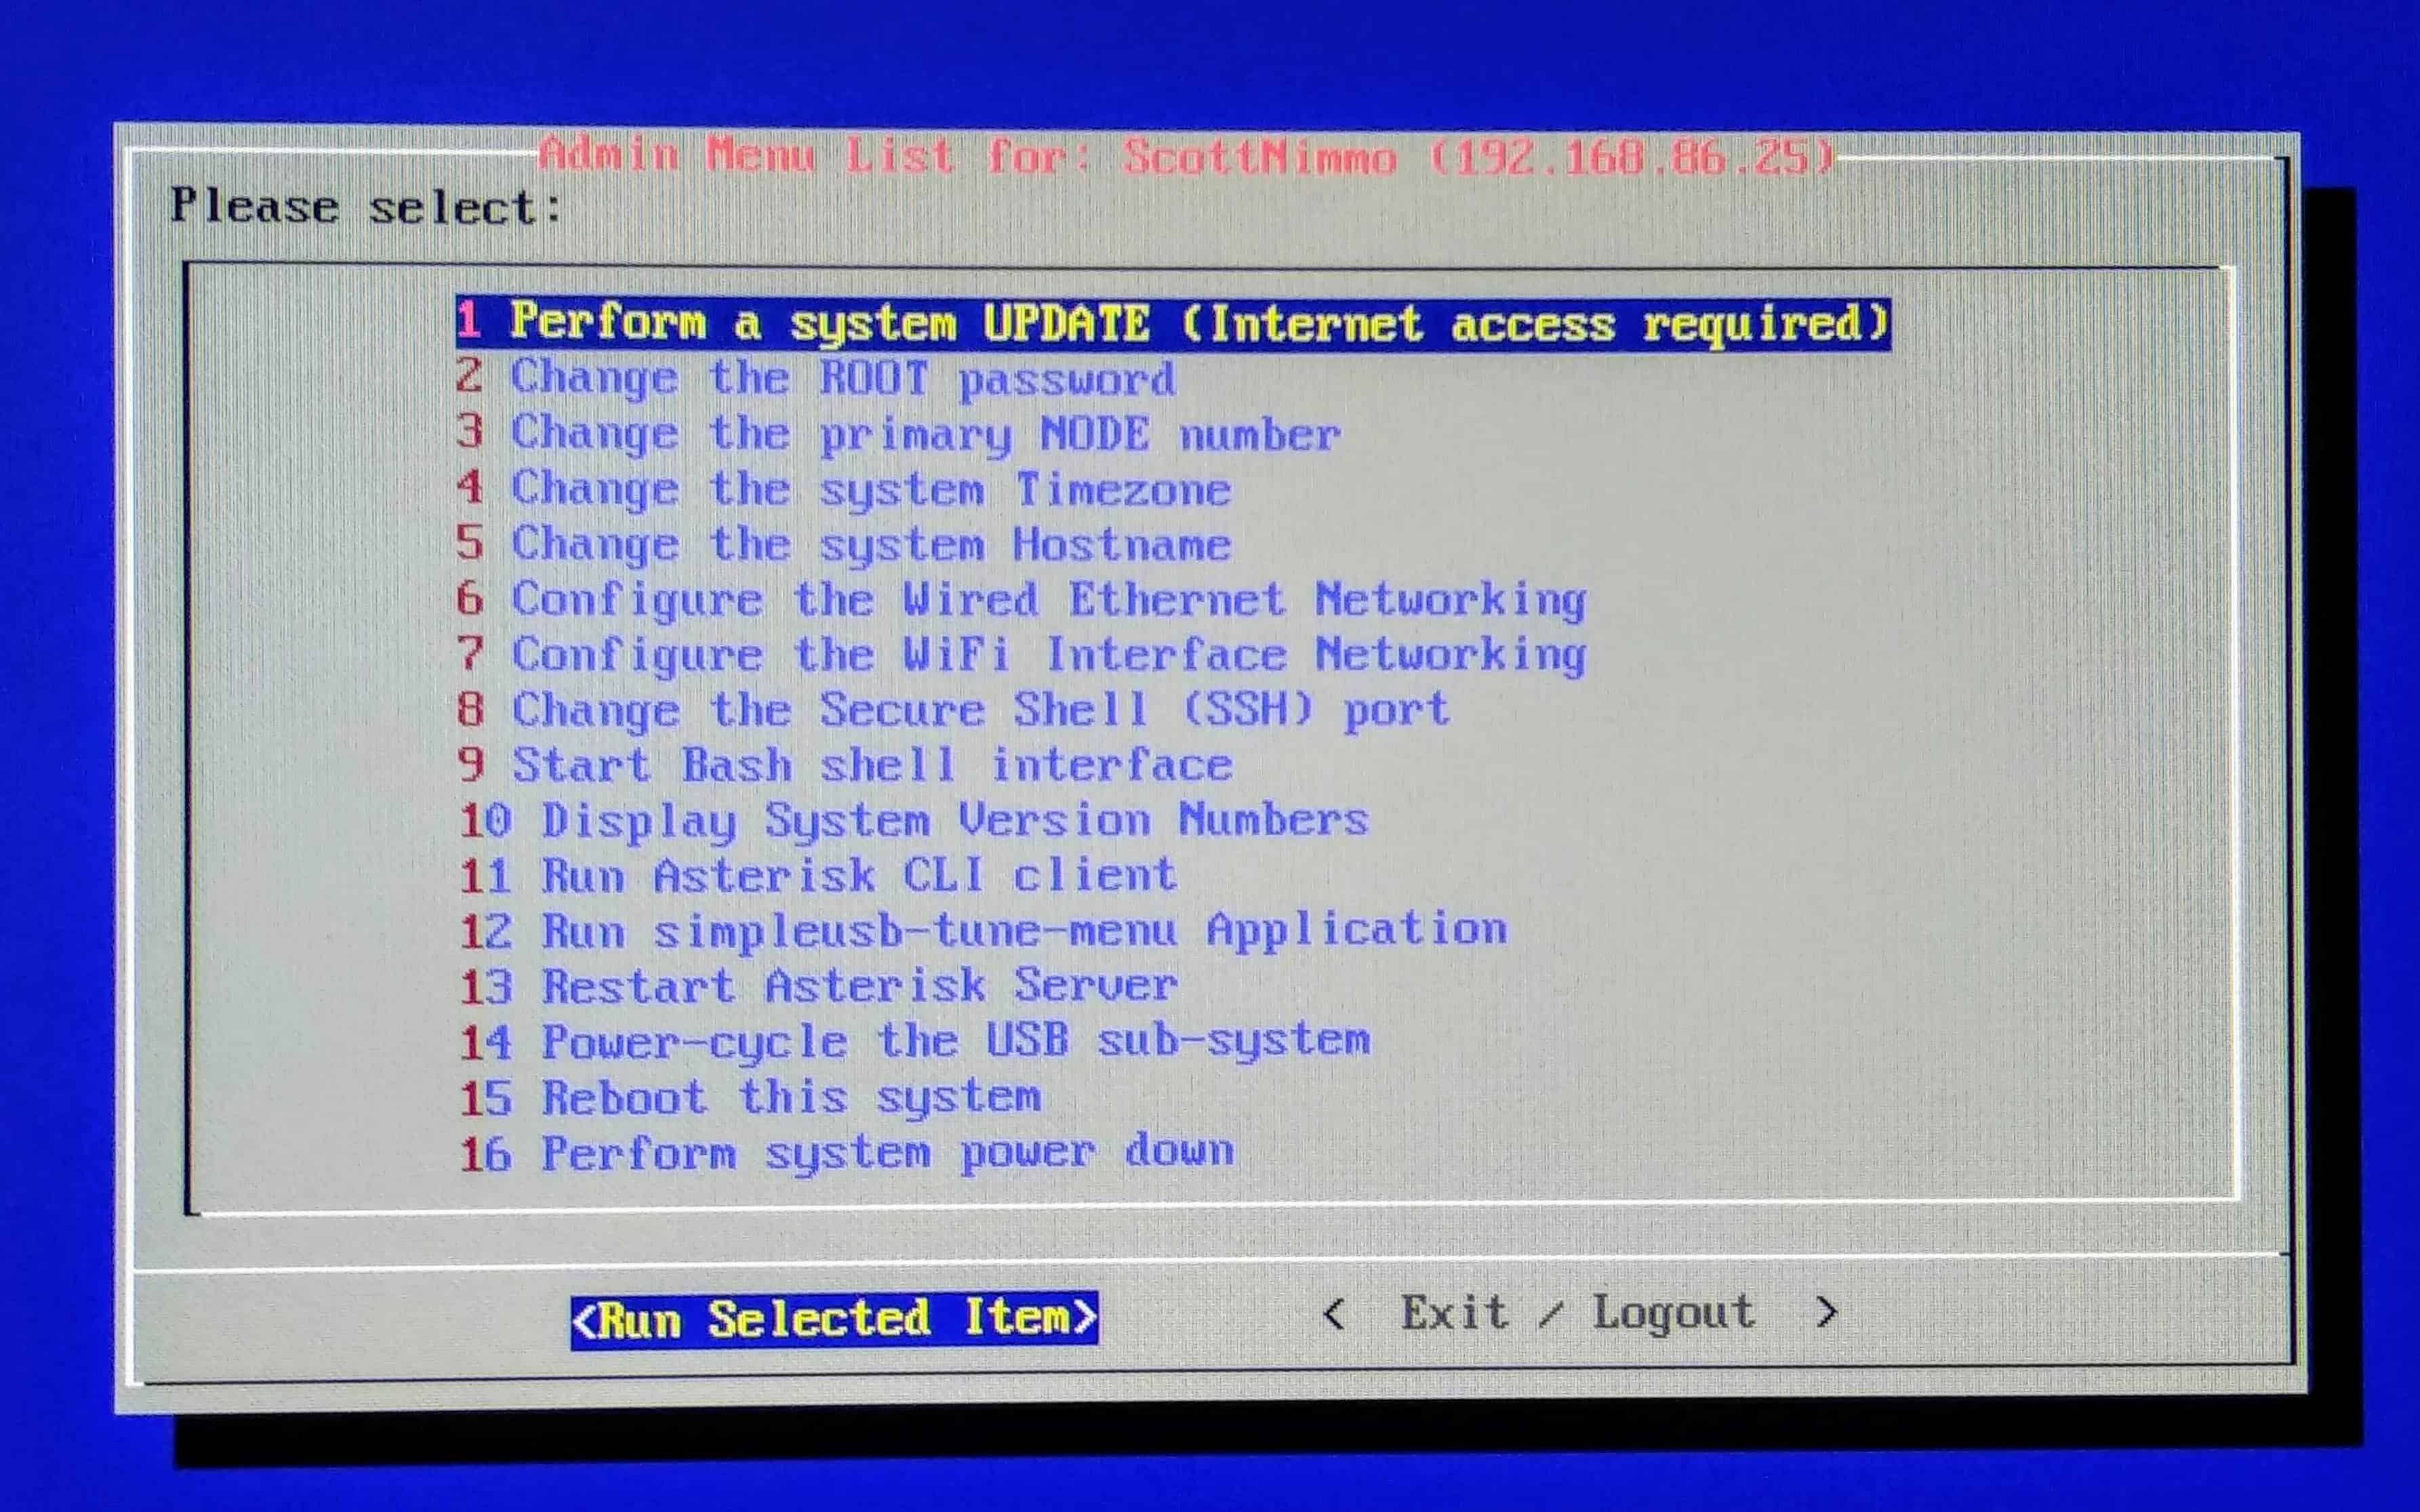
Once you have worked through the various options, rebooted and logged in again you should arrive at the Admin Menu List as shown in the photo below. If so, with luck, your SD card is now ready to be placed in your assembled node and you can move now on to our Operating Procedures section to fire up your node for the first time.
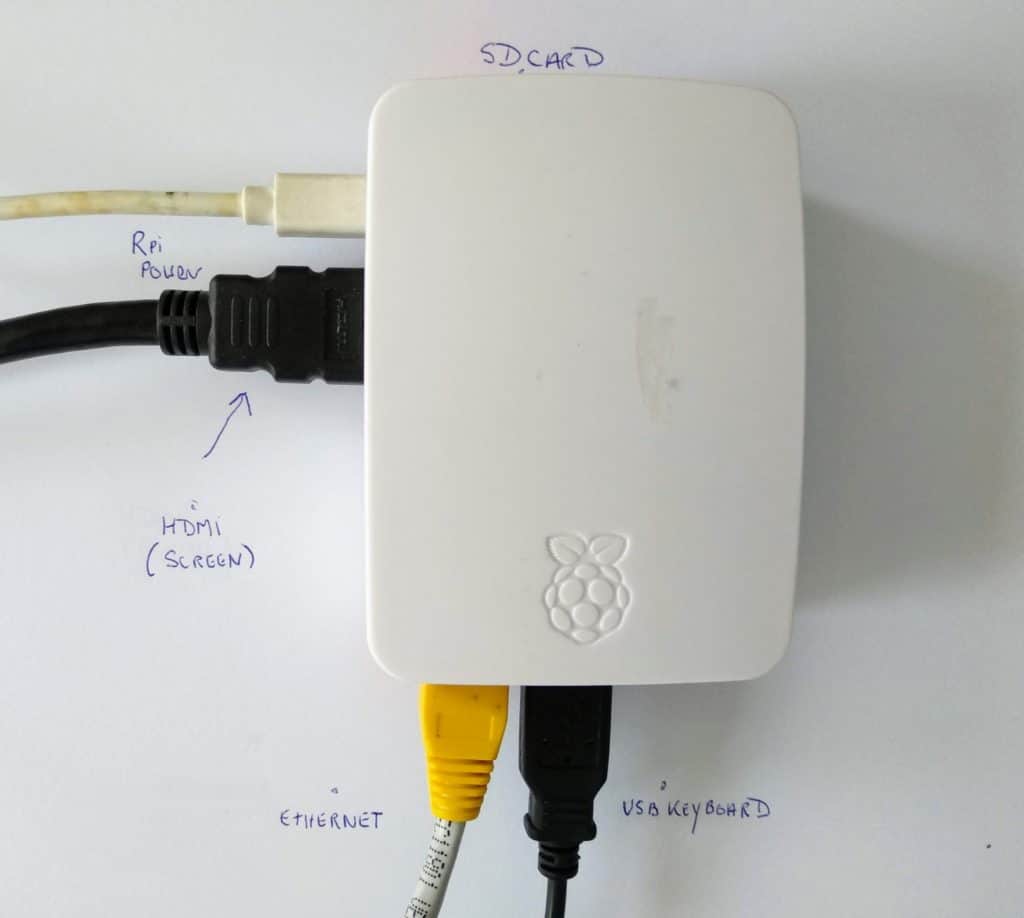
You have now arrived at the moment of truth! Place your prepared Hamvoip SD card into your assembled node, turn on your handheld radio set to the same frequency and CTCSS code and fire things up. If all is well you will see the green LED on the front of your node flicker and ten seconds later hear a voice ident with your callsign and the node’s IP address on your handheld radio. If you have reached this point then congratulations you have successfully set up your node.
Now you will want to learn how to connect and disconnect it to other nodes and hubs and start having QSOs. You basically have two simple options to explore at this stage { There are others } One is DTMF tones and the other is via an app or program.
Software Tools: In addition to the Hamvoip software you are going to need some additional programs to set things up. These are SD Card Formatter, Win32DiskImager and Putty. You will also need a USB card reader.